
In this installment of the master bathroom series, we’ll look a bit more closely at the glass tile shower. This shower was without a doubt the most time-consuming tile project I’ve ever done.
First, it was a large shower with a niche and lots of plumbing fixtures.
Second, there were five different tiles laid out in a random pattern.
And finally, the glass tile we chose was difficult to work with. It was hard to cut and install. Plus, the tile required additional precautions in choosing the right thinset and allowing proper cure time before grouting. But more on that later.
I began with the back wall and established a working layout. I was a bit worried that the bench might create some bad “slivers” of tile from a centerline layout, but it actually worked nicely out in this case.

I used a 1/16-inch grout joint, and spaced everything with these horseshoe spacers. I think you have to go to a tile supply house to get them, but they are way easier to work with than the little spacers from the big box stores.
As I mentioned, there are five tiles. Three green and two white. Specifically, there are three smooth tiles, a gloss green, gloss white and matte (etched) green. There are also gloss green and white with a wave pattern imprinted. My basic rule of thumb was to evenly mix the tile for color and pattern while trying not to manipulate so much that it looked contrived. I didn’t worry about the same tile touching side-to-side or up and down, but I tried to break up runs of color or pattern.
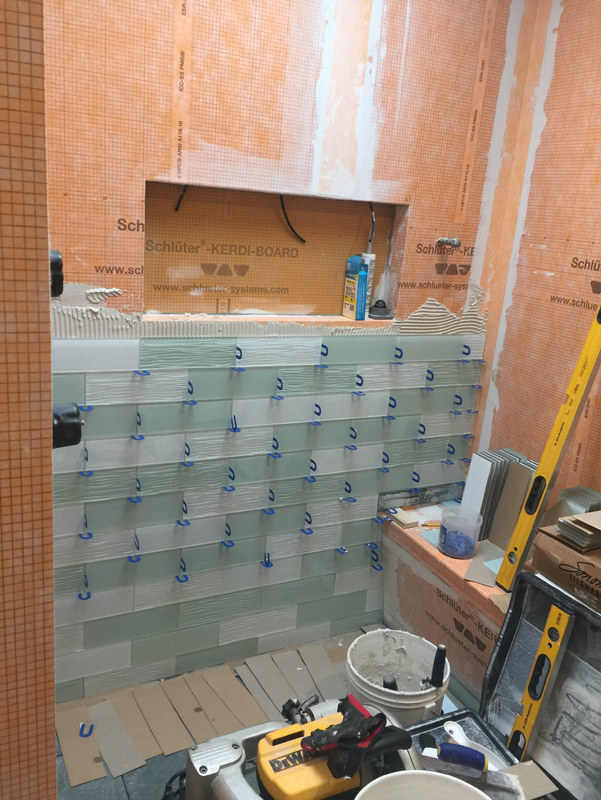
Continuing up the back wall and getting ready to tackle the niche.
There were some slight variations in the tile, so periodically I would double check with a level and make minor adjustments with the spacers.
Counter Challenges
The tiling started before the countertops, bench and niche shelf went in, but at this point, I was a bit stuck. I had to wait for the fabricators before I could go forward. And then there was a major mix up with the stone company. The person that measured the bathroom and did all the shop drawings understood what I wanted. We had a lengthy discussion of the specifics. Unfortunately, his instructions didn’t get communicated to the shop or to the onsite installers, so they had to rip almost everything out and do it again to get the look I was after. Luckily the damage was minor, and they were able to recut and reuse the pieces.
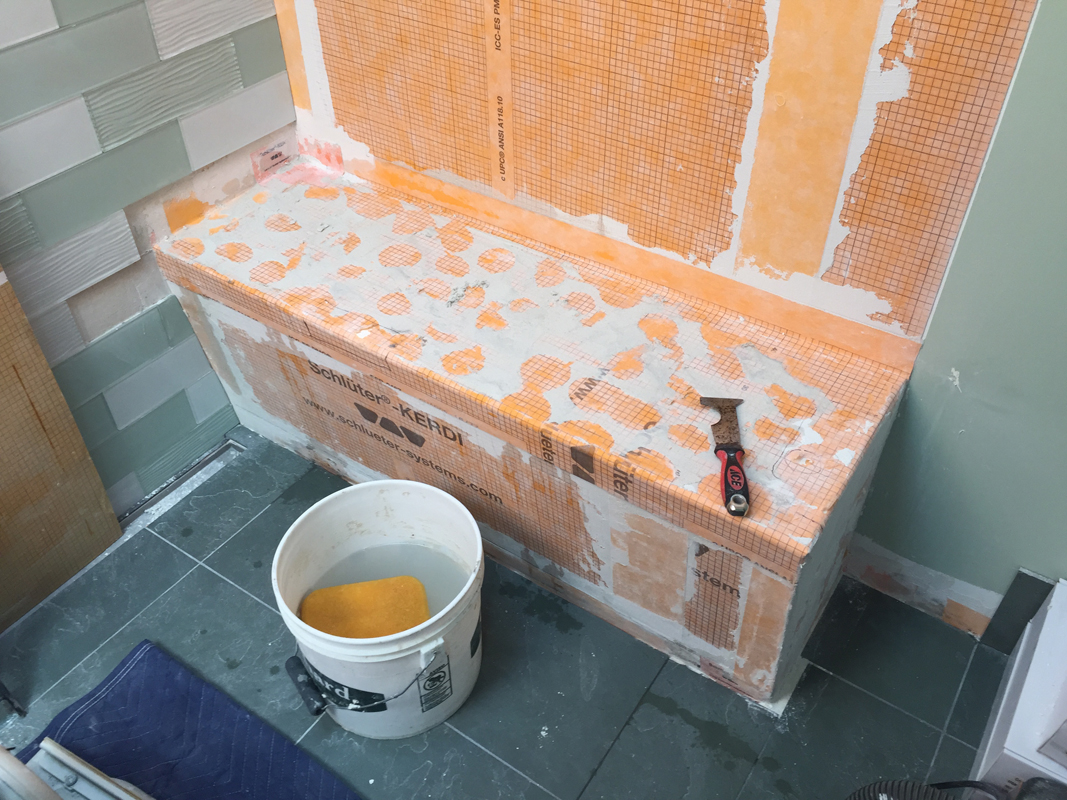
The bench after the first install was pulled out.
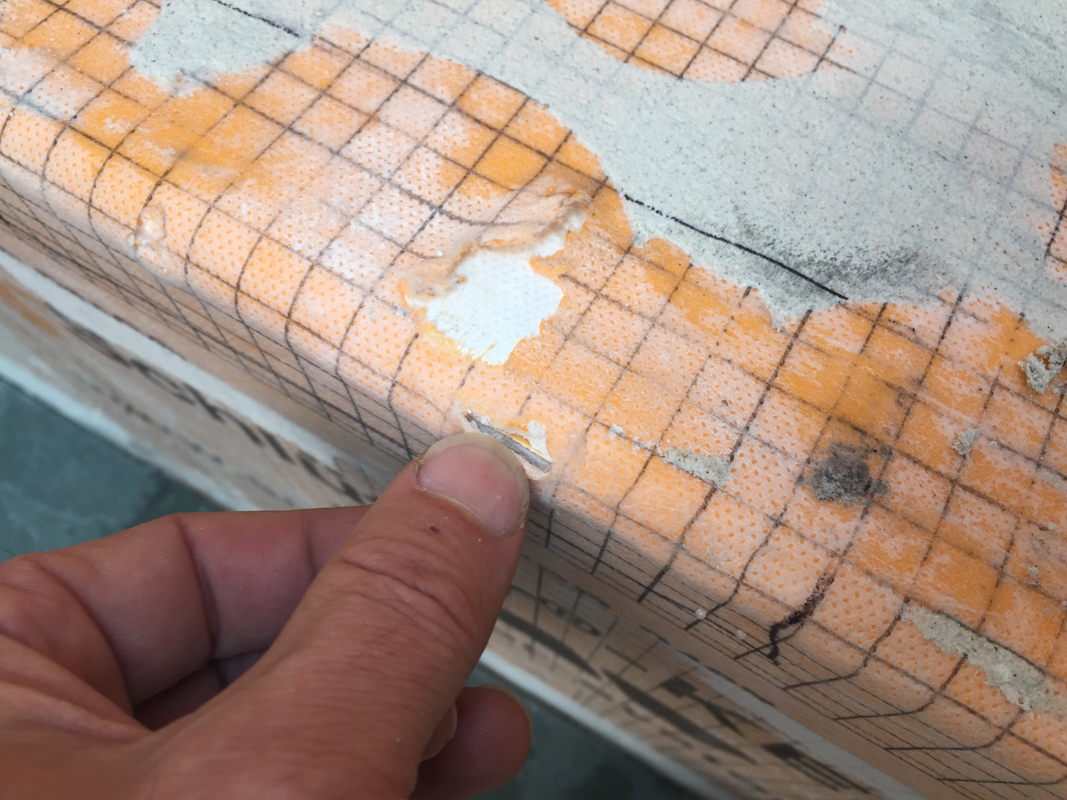
All these rips and tears had to be repaired to maintain the waterproof shower, though the risk of a leak here under the marble bench is low.
Niche Fix
When I got to the niche, I ran into a small layout problem. The tile was about a 1/4-inch too short to reach the sides of the niche. Nothing is ever not fixable, but I really didn’t want to tear open the wall to make the niche bigger at this point. I thought making the niche smaller would look out of proportion to the size of the shower. My solution was to use one of the sink cutouts from the marble slab to create this “frame” around the niche that matches the bottom shelf. It was a good fix that looks intentional, not like a quick fix for a layout miscue.
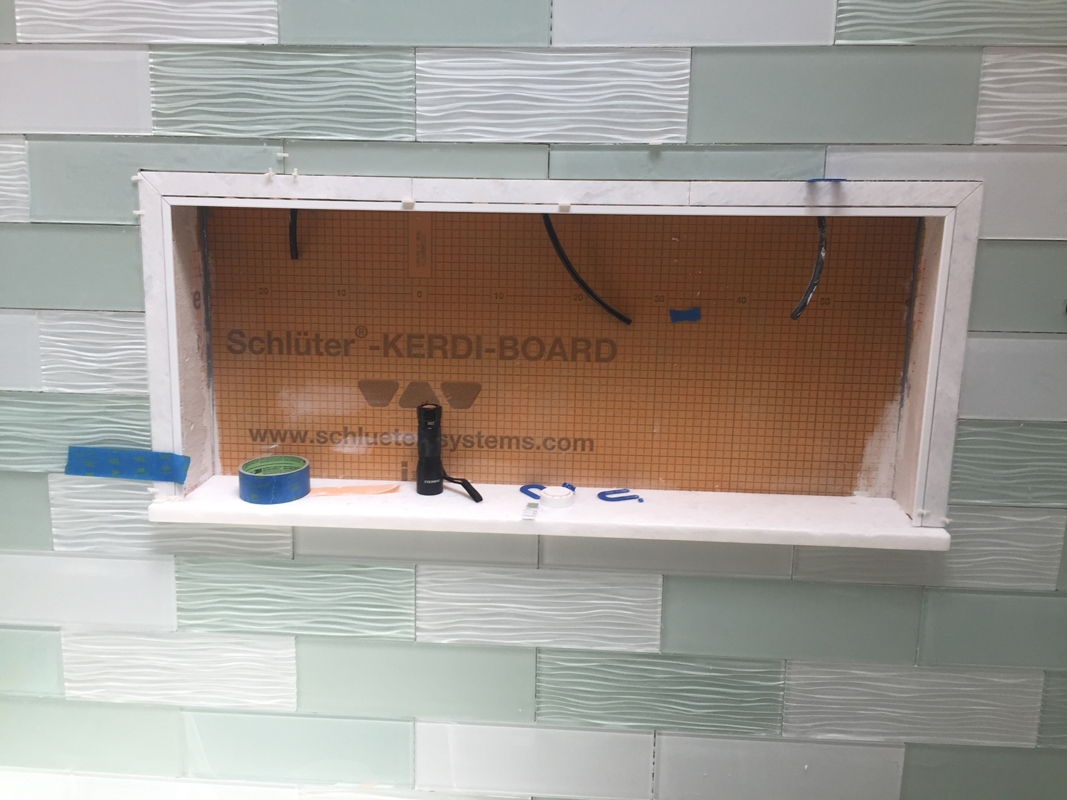
The niche with the marble frame. The black cables are the fiber optic leads from the LED light driver in the master closet.
The other challenge with the glass tile is cutting L-shaped tiles, like the ones at the corners of the niche. You cannot simply cut a square corner with a wet saw because it creates a weak stress point where the tile will potentially break, either while you are cutting; or worse, down the road after the tile is installed and grouted. To mitigate the possibility, I first drilled a 3/16-inch hole at the inside corner, then cut into the radius of the hole. I shattered multiple tiles just to get the four corners of the niche cut and fit properly, with even gaps for the grout joints.
Once I got around the niche, the remainder of the back wall was easy, with simple square cuts on the wet saw. Then it was on to the wall with most of the plumbing fixtures. I bought a set of cheap diamond hole saws on Amazon that included the large sizes I needed and they actually worked nicely. I set up a wet work table on my drill press and cut the round shapes I needed perfectly.

I had to open the wall and reposition the diverter valve for the shower. It was set too far out initially and the trim would have stuck out from the tile.

Continuing to work up both walls. The yellow tape was for marking tile locations because nothing worked on the faces and marks on the back would have shown through the glass.
Thinset Tech
I mentioned at the top the selection of thinset was critical for this shower.
Here’s the deal.
Glass tile needs some help to stick to anything. The best thinsets for glass have a lot of latex modifiers added that help it bond. But latex-modified thinset requires air to cure. Schulter recommends unmodified thinset for most of its products, because it cures without the presence of air.
But with glass tile, you need modified thinset. When you have a water impervious membrane lining the shower, and a water impervious tile (glass) there is no path for air, except for the grout joints. And the bigger the tile, the less joints. Sometimes it can take months for the thinset to cure fully. With a ceramic or natural stone tile, the moisture is absorbed into the tile. But not so with porcelain or glass. I spoke with Schluter’s tech people about this before selecting a thinset and given the length of the install, plus the additional two weeks I waited before grouting, I was confident I would have good performance and that they would honor the warranty. And we’ve had zero issues with the tile since install.
The Final Result
Overall, we are loving the finished result. We opted to not install a glass wall or door, so it feels open and airy. Some water does splash onto the floor, but since the floor warming mat is waterproof, there is no real possibility for damage. We just use a squeegee to drag any puddles back into the shower. The skylight vents steam and provides natural light, (though with the popularity of drones in the area, I suppose there is a bit of exposure risk).
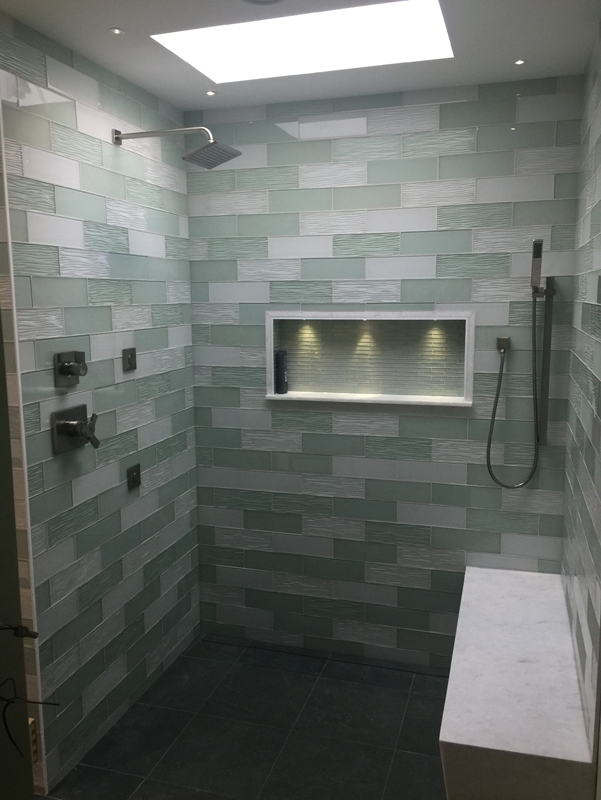
The rain shower and body sprays are pure luxury. The hand shower is great for bathing the dog and rinsing the shower after cleaning.
I’m going to do a separate post on the fiber optic lighting, but the shower has a soft glow at night.
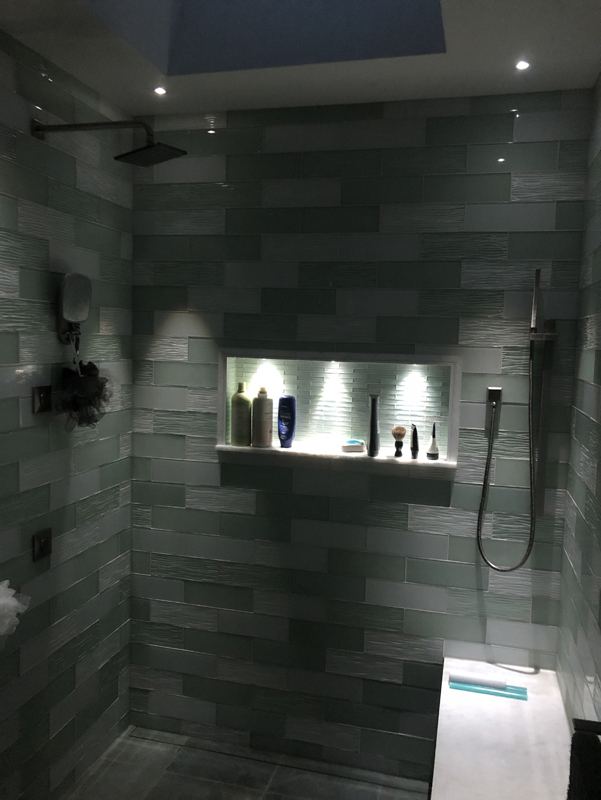
Fiber optic lighting highlights the niche and provides a small amount of ambient lighting.
You can even change the color to suit your mood. Here’s a video of the color cycle in action.

Pingback: Master Spa Bathroom – Part IV Fiber Optic Lighting |·
Pingback: Master Spa Bathroom — Part VI Wrap Up |·