
Let’s see, where did I leave off?
Whaaaaaat??? It’s been YEARS?!? Crap. I bet you thought that this site was dead!
Surprise! Welcome to 2019.
I’ve been meaning to get back to work on the blog for a while, but for various reasons, it hasn’t been a top priority. In fact, now so much time has passed that the house is basically complete and these posts are a retrospective — rather than a live play-by-play. I always wanted to do the blog as the work progressed, but the project was exhausting and stressful, often leaving me too drained to think about sitting down at the computer and cranking out posts. Plus, I was racing to get the project done as quickly as possible because. . . reasons.
So, I’m trying to go back in time a bit to show what we’ve done.
I had left off working on the “main” bathroom. The tile floor was in and I was getting started on the cabinetry. I did a brief post on the cabinets but didn’t go too in depth. So this may seem a bit repetitive, (but since it was more than a year ago you probably won’t notice.)
When we did the demolition, I removed and saved several Douglas Fir headers and beams. These were all old-growth from the 1950s when the house was built. It was the kind of wood that we don’t see very often today, and if it is available, it demands a premium price.
My plan was to repurpose some of this lumber to make the cabinets in the bathroom as an homage to the original house. Doug Fir is used readily in the West, since it grows abundantly in the forests of northern California, Washington, Oregon and Canada. I didn’t have a complete design in mind when I started, just some rough ideas. Then I went to work.
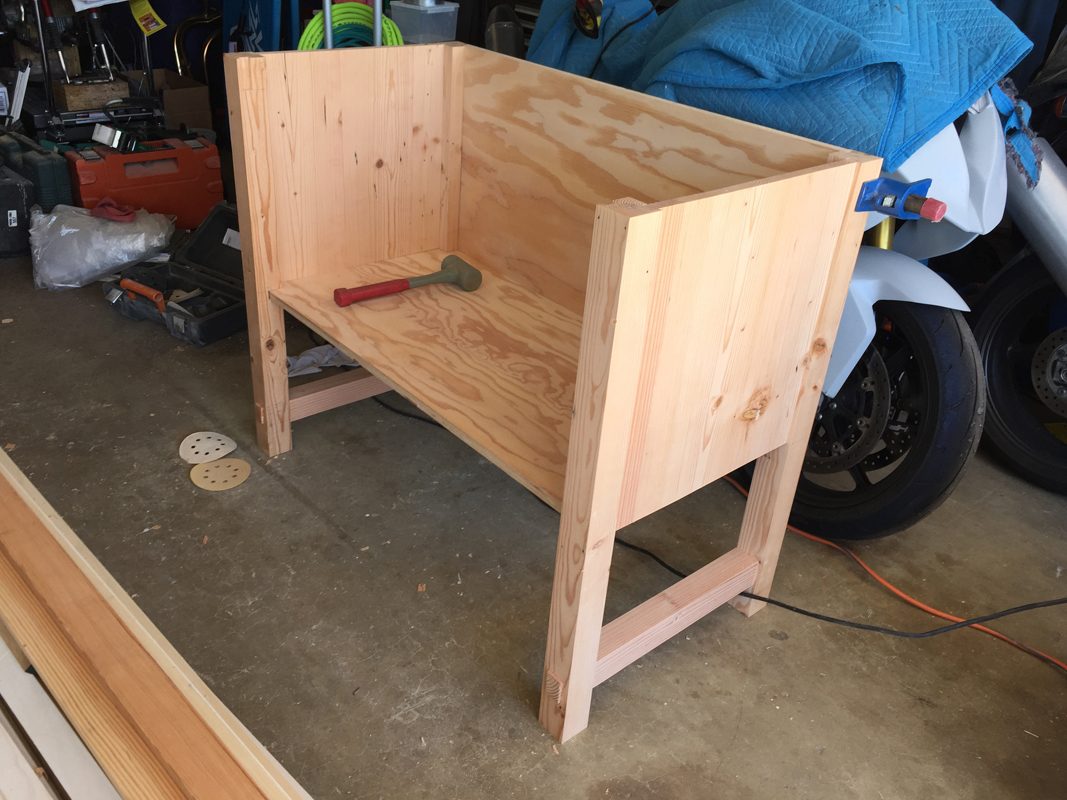
I started by picking 4 x 8 header that had some good vertical grain and started cutting. I decided on a cabinet with legs and a shelf underneath and came up with a prototype for the style.
- [click to enlarge]
This was a couple days of milling parts and gluing up panels, and also incorporated a sheet of leftover fir plywood. If you look closely, you can see the through tenons where the front leg and stretcher meet.
I sent this pic to my wife and our interior designer and they both thought it looked way too rustic for the style of the bathroom. They particularly didn’t care for the knots in the side panels. So it was relegated to the scrap heap.
But I liked the design so I got on the phone to source some clear (knot free) vertical grain Douglas Fir, which is tricky, but you can find it, especially here in California. It ain’t cheap though.
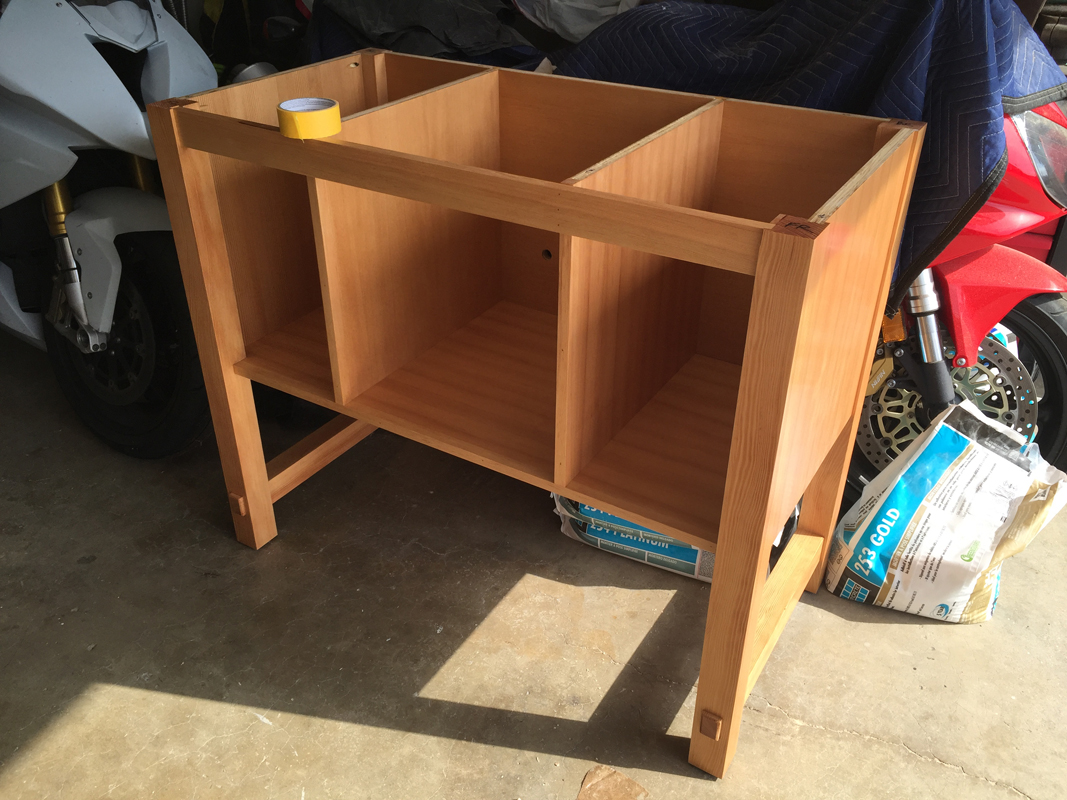
The next version was a little more complete:
[click to enlarge]
Now the layout of the door and the drawers is starting to take shape.
I managed to get the carcase (or carcass) out of a single sheet of plywood. However I did have to scab on a thin strip of solid wood on each of the four legs in order to get them to the full 2-1/4-inches square that I wanted. If I had left them at 2-inches I thought they would look spindly and undersized for the cabinet.

[click to enlarge]
If you look closely at the left side of the leg, you can see the 1/4-inch strip that was added. And also the through tenon from the stretcher.
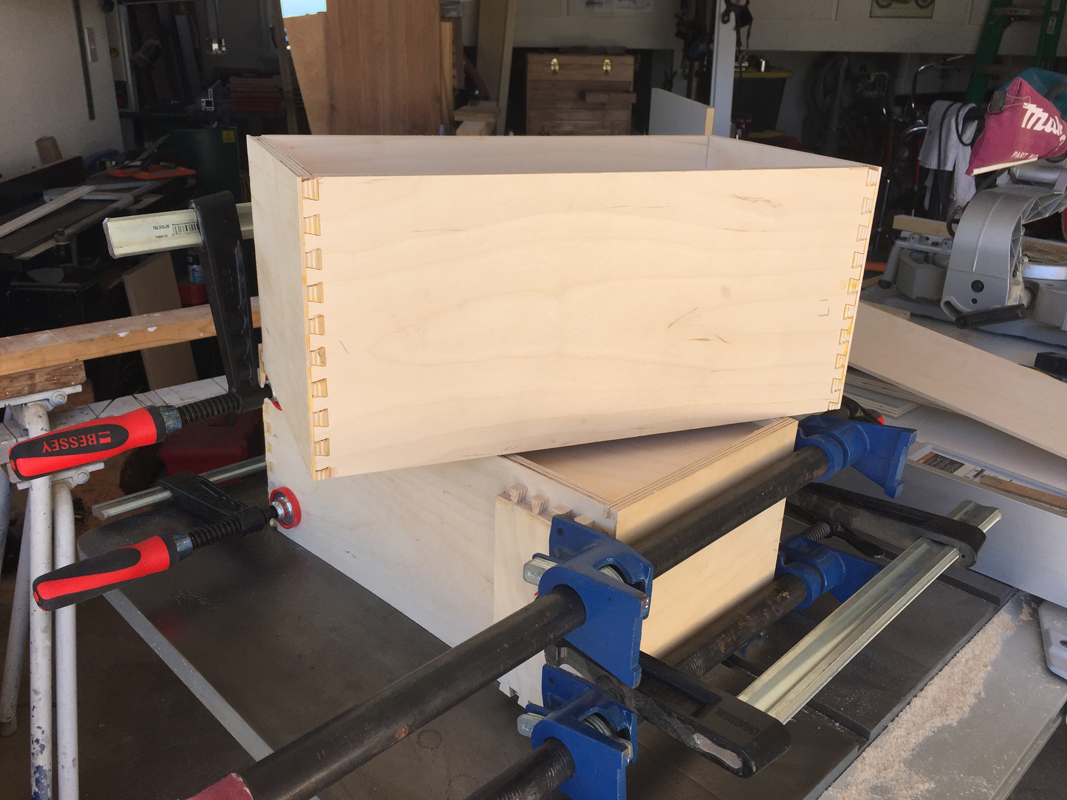
Next came the drawers. I just use a Porter Cable jig and a router. Once the initial setup is done, they actually go pretty quickly.
[click to enlarge]
These are basic dovetailed drawers. I like to make them out of Baltic Birch plywood because it is stable, strong and looks good.
I used more of the same clear Doug Fir for the drawer fronts, door and shelf on the bottom. The drawer fronts are just simple solid slab fronts, and the door is a flat panel. There’s nothing particularly remarkable about them.
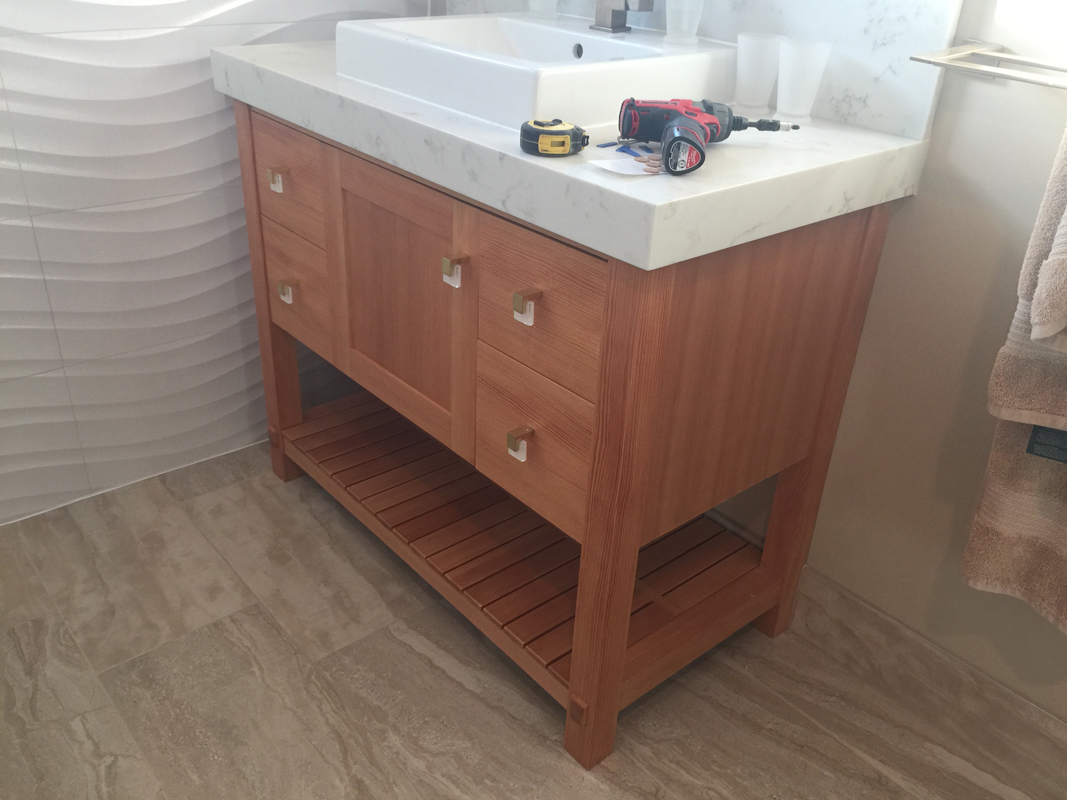
But the shelf on the bottom is another story. See, I am tall and I hate to have to lean way over to wash my hands at a low sink. So I usually build my bath vanities a bit higher than standard. This is great for me, but for a child, they can’t reach the sink to wash hands or brush teeth. So what’s the solution? I made this shelf pull out to serve as a step!
Here it is in action:
OK, that’s enough for now. Next time, I’ll cover the rest of the cabinets in the main bath, including the built-in unit and a floating cabinet.
Thanks for reading.
