
After writing my last post about the nine-foot patio door we installed in our master bedroom, I am unhappy to announce that it did not survive the first of the El Nino rains here in SoCal. I was not at all happy, but I couldn’t be too upset because I was partially to blame.
But that didn’t change the fact. It had to come out.
For days, I lamented that I was going to have to redo that door. I went through the five stages of grief. I thought maybe I could just leave it alone. But even though I had waterproofed the sill with peel and stick membrane, I knew that wasn’t really an option. But eventually I accepted that I was going to have to reinstall it, and just got on with it.
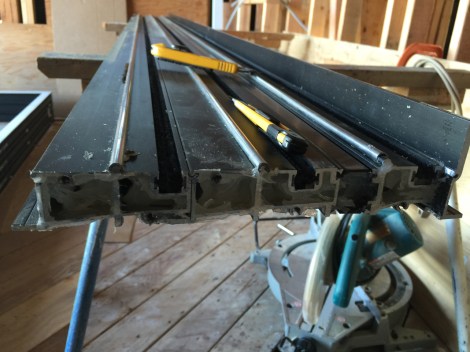
I was pretty certain I knew the problem. And, to be honest, , I am a little surprised that the manufacturer leaves this detail up to the on site installers. The installations instructions call for the sill extrusions to be sealed with silicone or some other sealant before the sill gets joined to the side jambs. The sealant prevents any water that drains down through the weep holes in the sill from running out the end of the extrusion. So if there are any voids in the sealant, you have a problem.
Personally, I would think that the manufacturer would simply seal this detail at the factory to minimize future warranty calls from homeowners, because the chances of getting a perfect seal on site is difficult. As I learned. I read the instructions carefully and thoroughly and I still screwed up. I doubt most framing carpenters probably would be so careful.
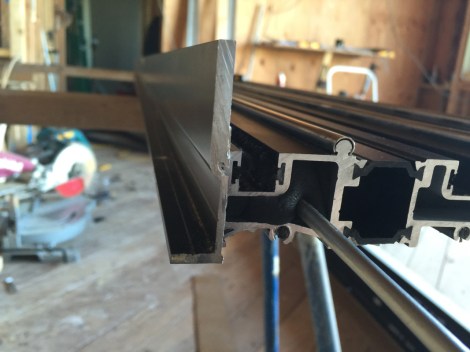
My first attempt at sealing the sill. You can see that there are plenty of voids in the sealant. I had to cut this all out before I could fix the problem.
After taking the doors back out of the frame I was able to pull the screws and get the frame back down on the floor. Then I could disassemble the sill and get to work on the old silicone. I used a razor knife, a needlenose pliers and some silicone remover to work the sealant out of the extrusions and get them ready for the new stuff.
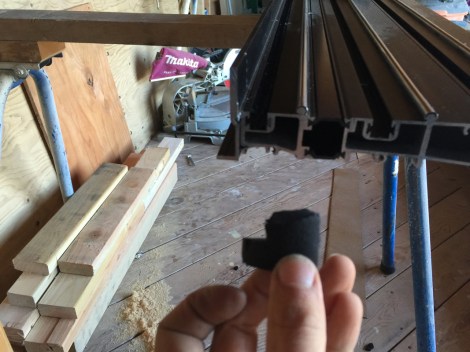
Foam plugs provide a backer for the sealant to press against, which prevents wasting material and offers a more complete seal.
To make certain that I had complete coverage, I carved some foam plugs out of a scrap of pipe insulation. They didn’t have to be perfect, just enough to give me some backer to pump sealant up against. I pressed them into the hollow ends of the extrusions about a half inch.
A pencil or a detail paintbrush helps push the plugs into place.
Once the ends of the sill extrusions were plugged, I could reapply the sealant with a bit more care. Then I reassembled the frame (with even more sealant) and popped it back into place. Since I had the door set prior to this little adventure, I could just reuse the shims and solid blocks, so reinstallation went a whole lot faster.
Next, I can get started on wrapping the frame on the exterior.
