
I’ve been dreading the work that needs to be done on the roof since before this project started. This is the first time I have ever owned a house with a clay tile roof and have heard nothing but horror stories about how difficult it is to work on them without causing more damage than you actually fix.
I had made a couple calls to roofing companies, including the company that installed the roof new several years ago. (Prior to the tile, we had a classic “tar and gravel” roof, where layers of tarpaper are put down with hot tar and then covered with sand and gravel to prevent the sun from breaking down the asphalt.) But with the threat of an El Nino winter looming, they were all busier than usual and nobody was very interested in a small job like this one.
All we needed done was the installation of two new skylights in the master bathroom. We needed the skylights because the only source of natural light in the new configured space had to come from above. The only bit of exterior wall available is in the shower and neither of us are too keen on that option for several reasons.
Eventually, I got to the point where I couldn’t wait any longer and just jumped into the task myself. The first step was clearing some space on the roof deck so I had somewhere to stand while I did the work. That meant trying to figure out how to get the tile up. I first thought that a slate ripper would work well, so I ordered one. But smashing the slate ripper resulted in cracking the tile, so I started gently lifting up the tiles until I could peek under and see the nail heads. It turned out the simplest and least damaging way to get the tiles up was to simply use a flat prybar.
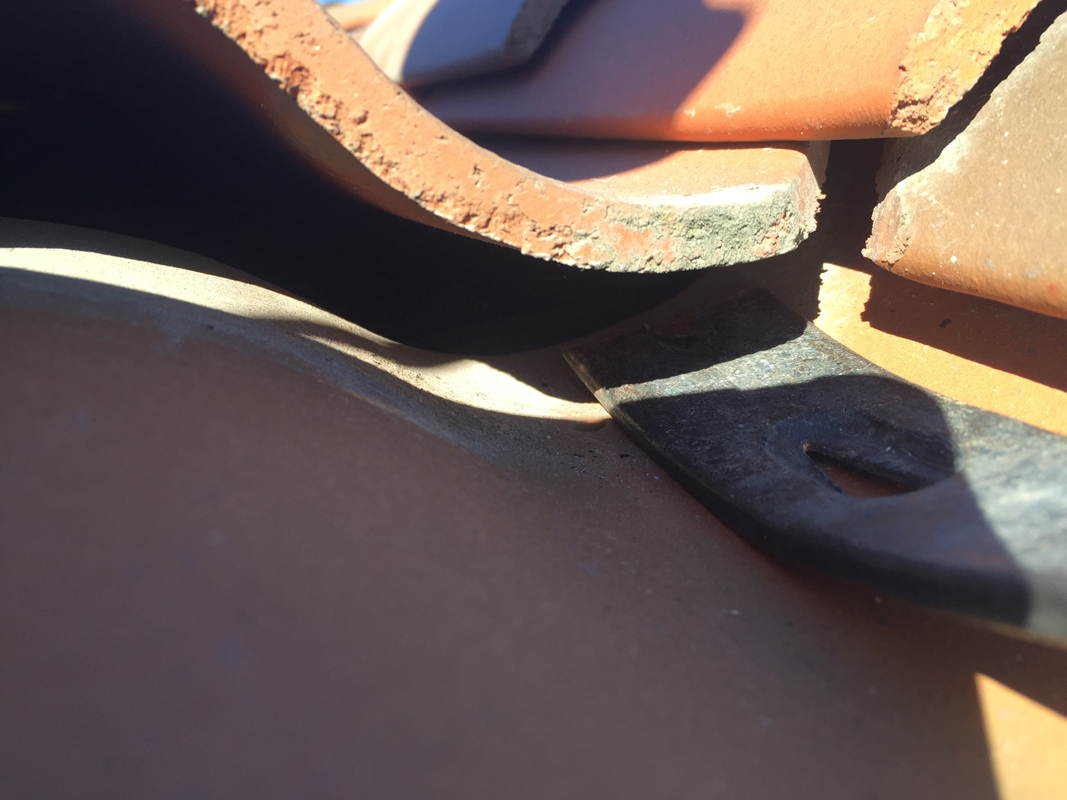
By carefully lifting the tile above, a flat pry bar can just reach to the nail in order to pull it out and slip the tile out of place.
Once I pulled a few tiles up, I could finally stand without worry. I didn’t know until I started pulling tile up that the tile is not what makes the roof waterproof. That is the job of the double layer of heavy building felt that underlays the tile.
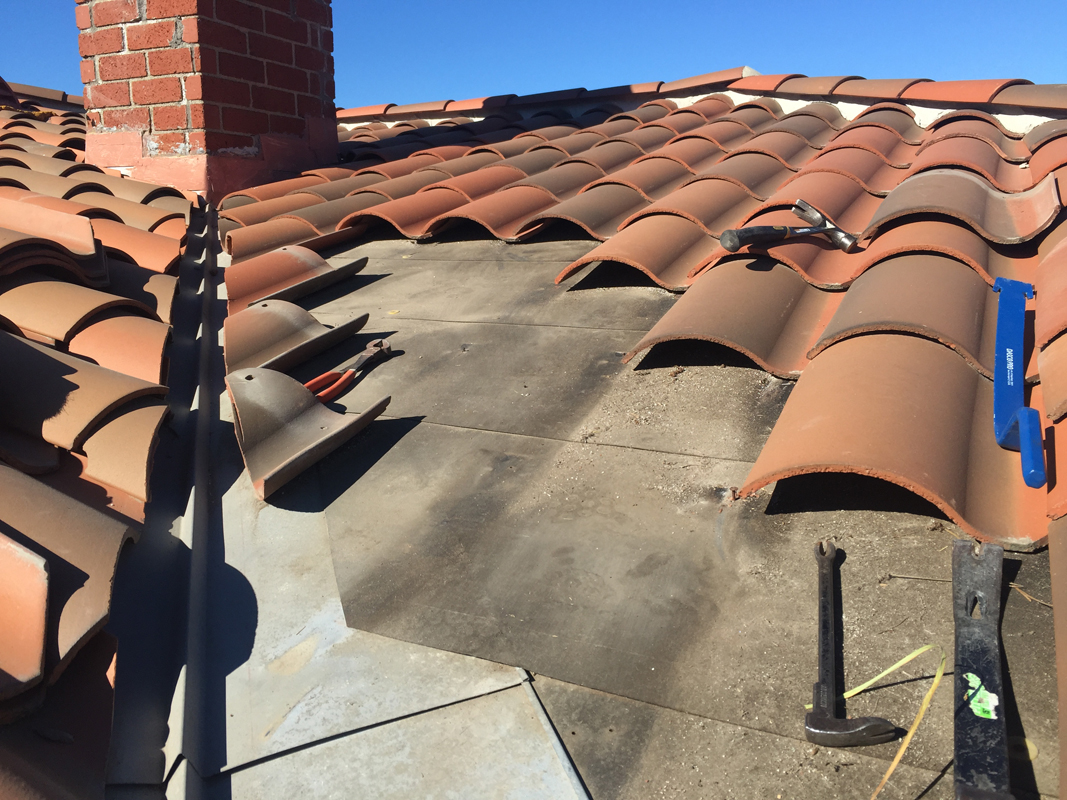
Once I got to this point, the rest was easy. I could walk easily on the gentle slope, and I just had to remember where each tile came from to reinstall.
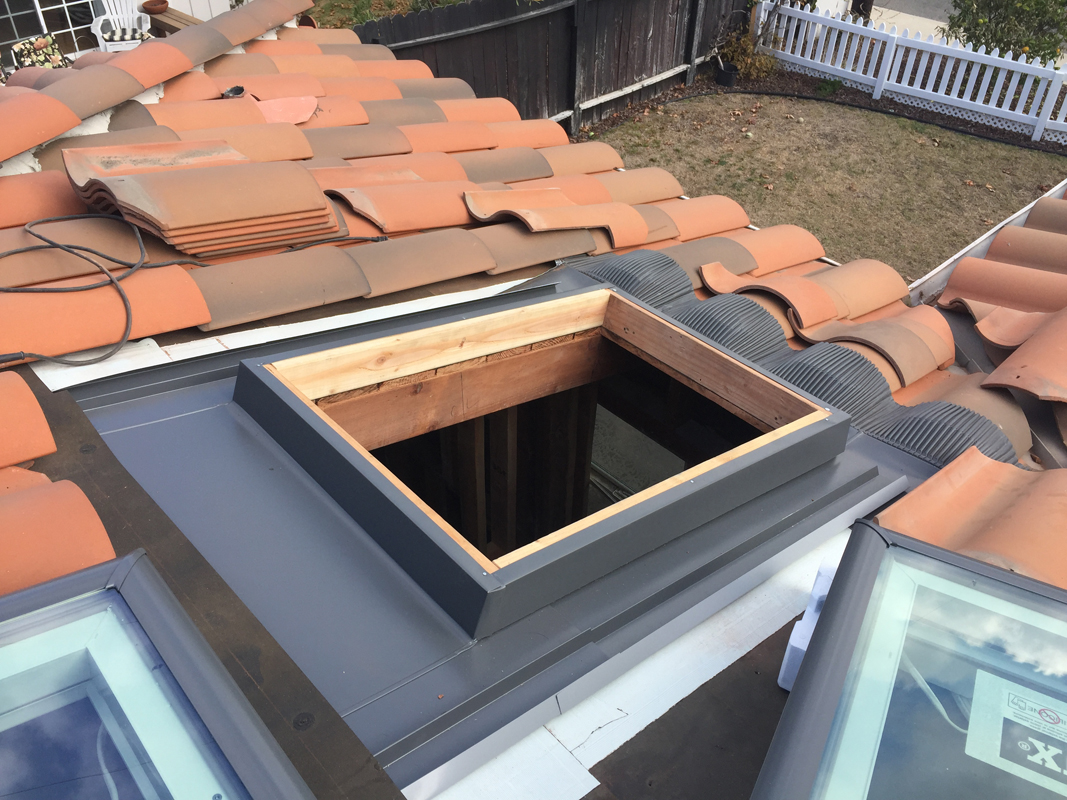
Once I got the tile stripped off, I installed the wood curb that the skylight sits on. Then a series of peel and stick membrane pieces went down on the roof to create a watertight seal. The nice part was that once I had the hole cut in the roof, I could work off a ladder from the inside, which was actually easier than working on the roof itself.
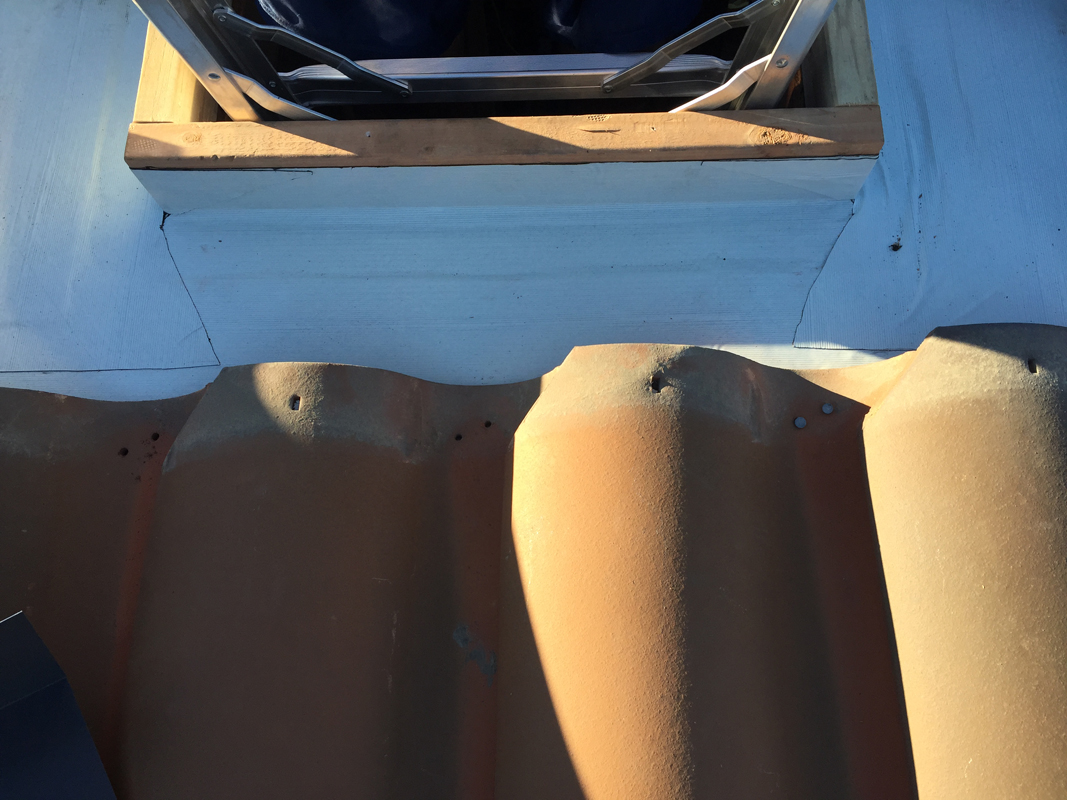
The white flashing membrane wraps up the curb and onto the felt, overlapping about nine inches, this prevents any water from moving laterally and getting past the roof.
With the curbs installed, I was ready to move onto the aluminum flashing kit. Velux, the skylight manufacturer, makes a kit specifically for tile or high-profile roof materials with a corrugated, flexible bottom flashing that forms to the tile. It’s a must in a situation like this, but still a challenge to get it installed.
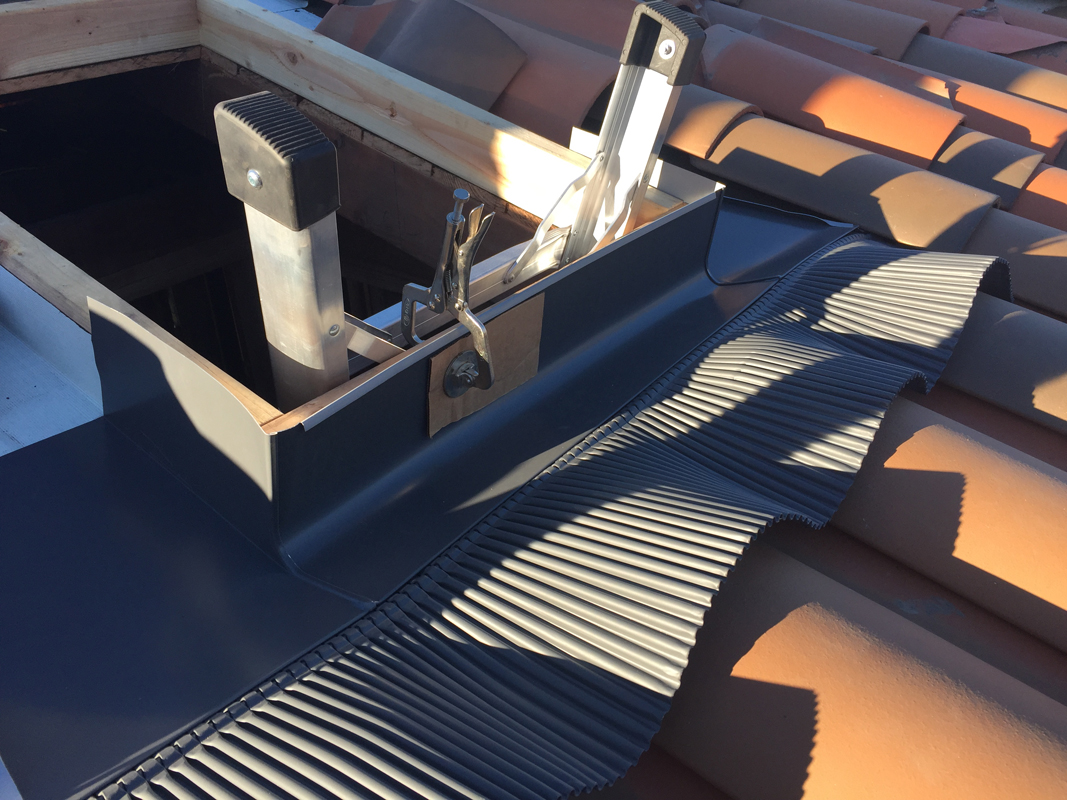
The bottom flashing is flexible to form tightly to the profile of the tile. But I still had to clip the highest area of the “barrel” to get a fit I was happy with.
After a couple calls to Velux customer support and and firing some of these photos over to them, they suggested cutting the top of the tile a bit “flatter” to lessen the severity of the height difference between the roof deck and the highest point of the tile. I have a diamond blade for my angle grinder, so I cut some tile away until the flashing started taking the correct shape and water could drain down the roof.
Once that bottom flashing was in, then the sides and top were very straightforward. Again, working from a ladder on the inside was far easier than crawling around on the roof trying not to break anything.
Ready for the tile to be cut around the opening and reinstalled. The skylight itself just rests on top of the opening and gets secured with two screws in each corner.
The second skylight was basically a repeat of the first, only smaller. The real challenge with that one is on the inside, because of the multi-plane roof. I’ll cover in the future.
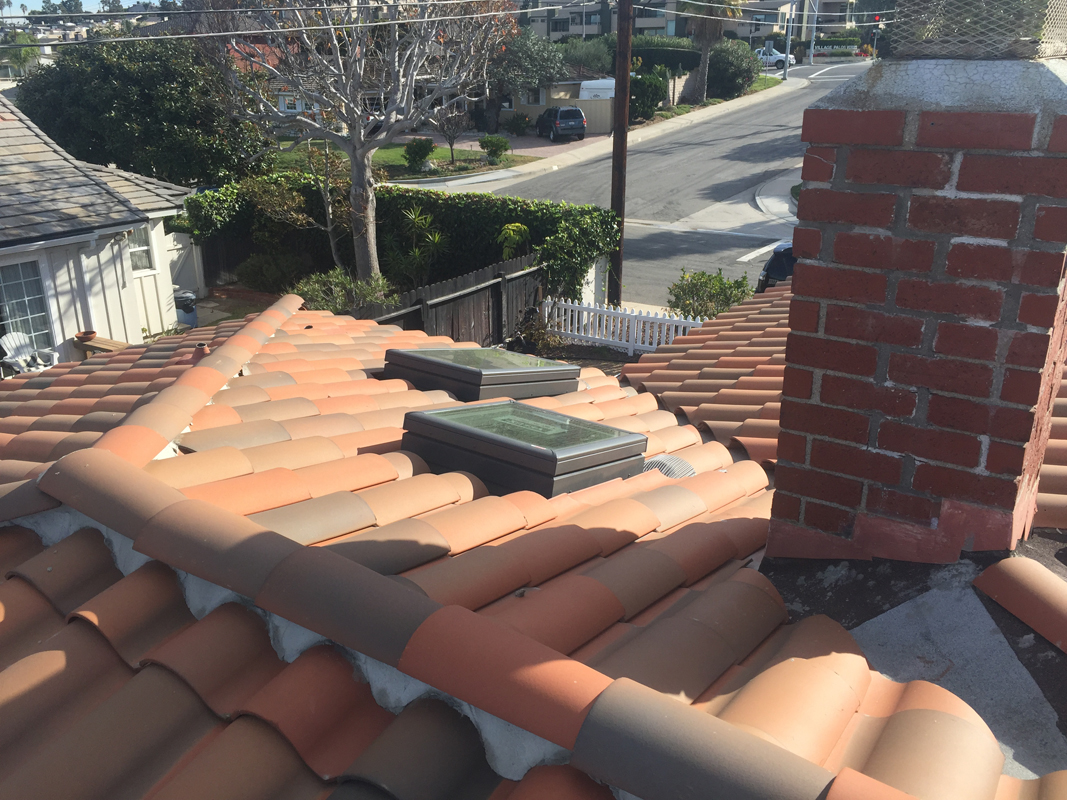
There they are, providing much needed natural light in the master bathroom.

Pingback: Slipper Logic |·
I’m sure you inherited your genius from your dad. Lucky, lucky you…
Love, Mom ; )
LikeLike