
I was looking around at the projects completed and am feeling pretty good. There are a few things that I could have done better, but that’s just the perfectionist in me. Most people wouldn’t even notice the little things that I do. After years of trim carpentry, i can spot lines that aren’t straight, walls that aren’t plumb and anything that is not level. So I really try to take care to make certain that my work is as close to perfect as I can make it, even if it costs time.
A lot of people probably think “Good enough” and move on, but it’s just not my way. Not that my way is better, it’s just mine.
For example, the deck.
All in all, it’s really a beautiful piece of work.
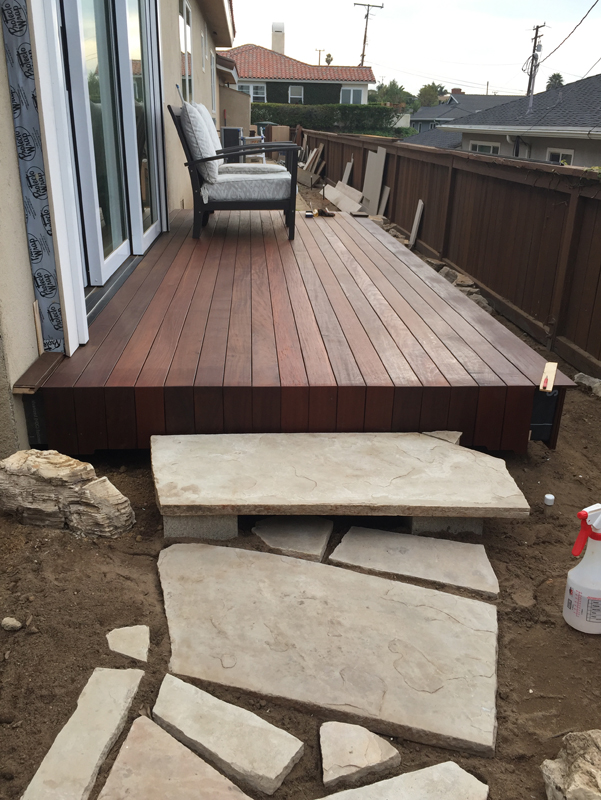
Just the right size for sitting to watch the sunset. The flagstone is recycled from the hearth of the fireplace in the living room.
I’m not sure why I’d been putting it off, because not having it done has really been inconvenient. Plus, it makes the focal point of the door in the master bedroom kind of insignificant and incomplete. The framing has been done for months, because I had to get that finished prior to installing the door. And, though we don’t get much rain here, we did get a couple pretty steady downpours last winter that splashed dirt and sand all over the glass that I just cleaned.
I knew that I wanted the space to be special. I wasn’t interested in a just a basic deck that is slapped on to so many homes. (many of which I had a hand in building) I spent considerable time and mental energy getting the floor of the bedroom recessed to accept the multi-slide door, just so the deck would finish at the correct height. Plus, since the views are so good, that will be a perfect spot for a glass of wine or single-malt before bed.
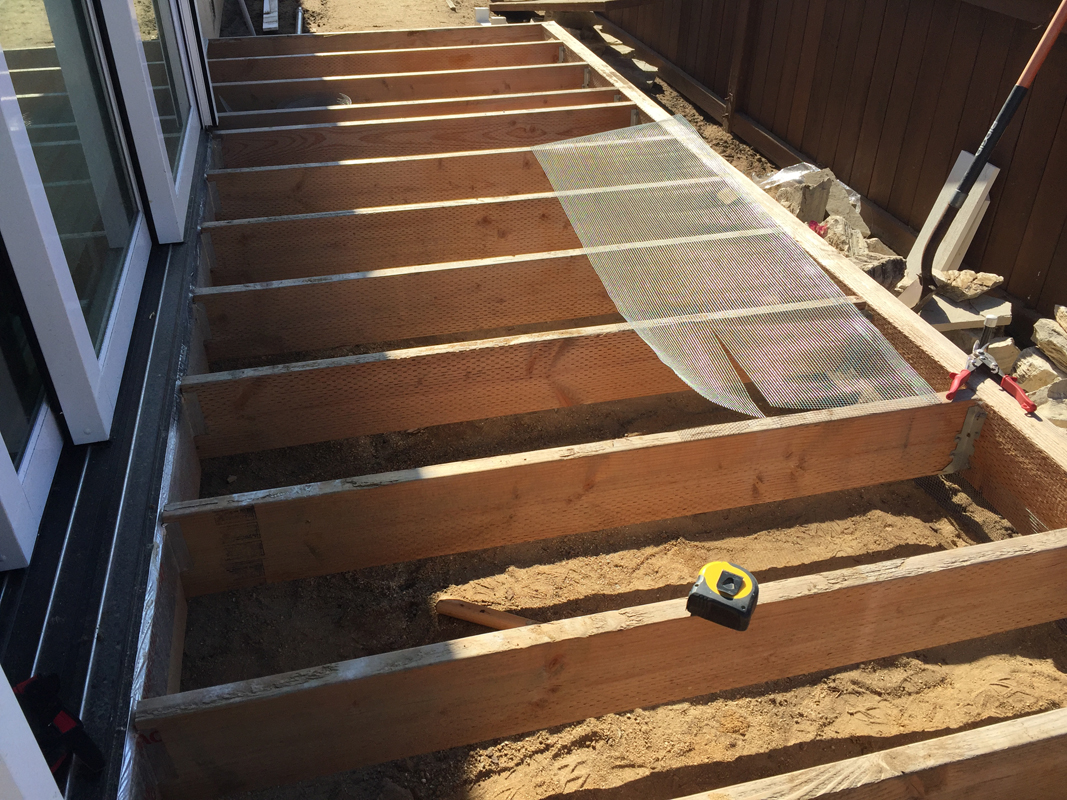
The framing was designed to minimize the step down from the bedroom floor to the deck. I couldn’t get everything on the exact same plane due to the design of the door sill, but it’s close.
Since this is a ground level deck, I wanted to make sure that I would not have to spend a lot of time chasing critters out from underneath the structure. It is the perfect hiding place for the multitude of raccoons and skunks that roam the area. To solve the problem, before it became a problem, I trenched along the perimeter of the frame so I could bury some hardware cloth to serve as a barrier to keep the critters out.
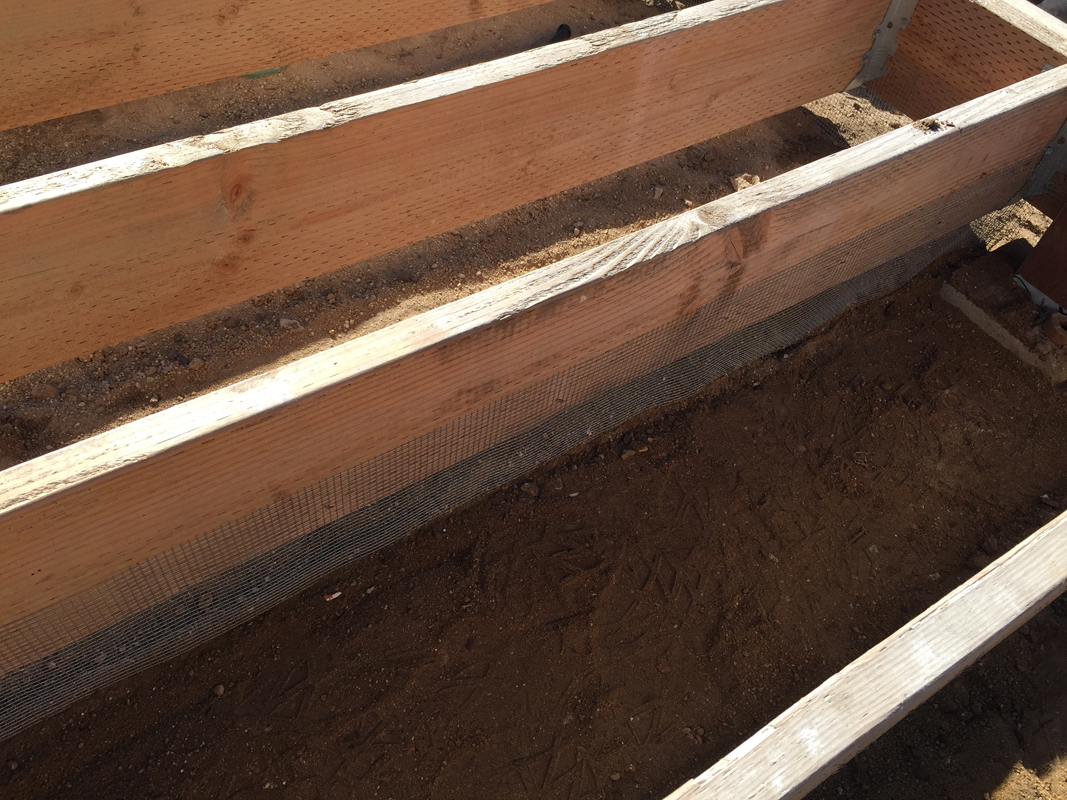
And stapling it to the side of the joist keeps them from bypassing it at the top.
I have been looking at decking options for a long time and trying to source material. Various lumberyards all seemed to have a different selection all at different price points. My local lumberyard that I used for all the framing lumber probably would have got me the best pricing, but they didn’t have exactly what I wanted. Same problem at the box stores — they had some good options, just not what I was looking for. I knew that I wanted hardwood versus redwood, which is pretty much king out here. They say that termites won’t eat redwood, but around here we must have some mutant termites, because they will eat almost anything. So I wanted to up my odds at having a finished product that would last.
The three biggies in hardwood decking are ipé, cumaru and tigerwood. They are ironwood family woods sustainably harvested in South America. Sometimes they get called names like Brazilian walnut or Brazilian cherry. I wanted something with a darker, consistent and richer tone, so I chose ipé. There’s a huge internet dealer that specializes in hardwood decking, and they have pretty good prices. I’m on their e-mail list and they send out specials and coupons pretty regularly. By paying attention to the sales, I managed to get a pretty good deal on the lumber. Plus they have a West Coast warehouse that isn’t too far away and they offer free delivery at a qualifying price threshold.

Bootsy checking out the lumber delivery. It has a kind of funky smell when you cut it, so I’m certain her nose was on high alert.
I pre-oiled all the lumber before I started installing the deck, because for the bottom side I was only going to get one chance. Once the decking is on, it is completely inaccessible.
The last thing the framing needed was some waterproof membrane across the top of the joists. This is precautionary, but prevents water from seeping into the top of the wood and rotting the joists over time.
Finally, I could actually begin the decking.

Normally, you can simply install a deck and let the boards run long at each end, then come back later and cut them off. In this case, I wanted to do something a bit more custom. I decided that I would finish the ends with a mitered end and a vertical skirt.

The boards came with the slots already cut to accept the hidden deck fasteners, which saved me a lot of time.
That meant I had to cut each board to a precise length. I ordered the material full length, so there are no seams on the deck surface.I didn’t have a lot of extra pieces, so I had to measure carefully . I decided to do all the top boards first, then come back and do the ends.
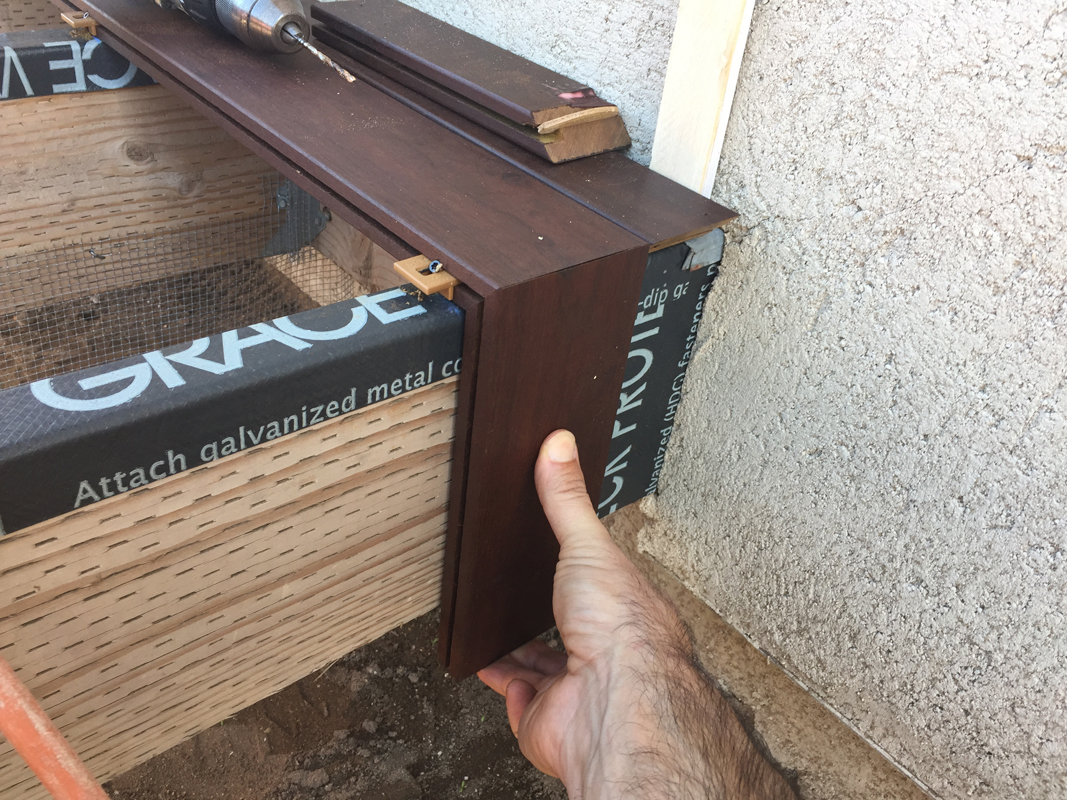
I used my biscuit joiner to cut a slot in each end then fastened them with the ipé clips and a stainless steel screw. Occasionally, I found that the hidden fasteners would set really well, and it was difficult to get the next board underneath. But, I found that a hammer claw worked well to bend the clip back straight, making it much easier.

Next, I moved on to the skirt. Ipé has a lot of natural oil, so I didn’t want to rely only on the end grain glue to do the job long-term. I decided that a combination of water, polyurethane glue and biscuits would give me the best chance of these miters holding together long term.
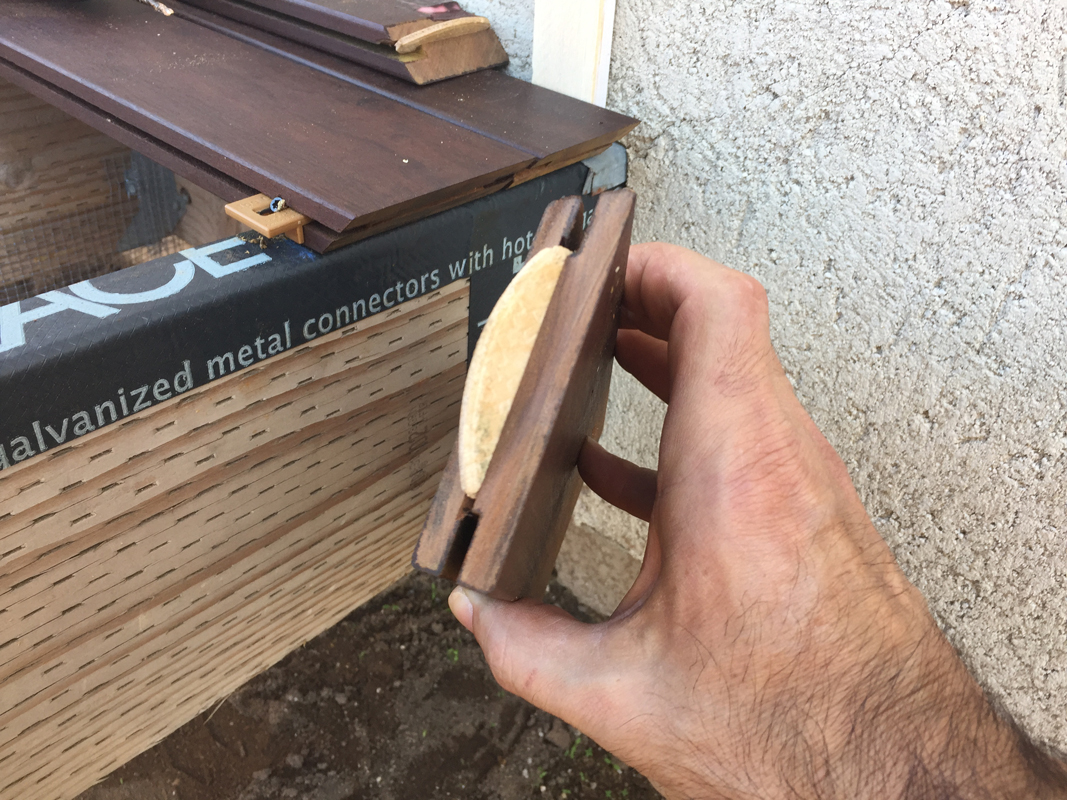
These football-shaped biscuits swell up when exposed to water, making a strong joint. At this stage, I’m still testing whether this will work, so the deck isn’t fully installed yet.
Once I was satisfied with the look, I went ahead with the decking.
The decking went pretty quickly and despite a little extra time fitting joints, so did the skirting. After misting the ipé with water, I ran in a bead of glue on both side of the biscuit, then shot a few 18 gauge pins to tack it together.

A big F-body clamp kept everything aligned during the initial glue set up, then I used stainless steel finish nails to secure the bottoms.
After the glue cured I cleaned up the squeeze out with a sharp chisel and then flooded more of the ipé oil into the joint for a bit of extra protection against the weather.
The last thing I needed to do was trim the ends of the skirting at the bottom. And since I am a big fan of Greene and Greene and the Arts and Crafts movement in general, I added a cloud lift detail. If you have ever been to the Gamble House in Pasadena, you know that this accent is prevalent throughout the building.
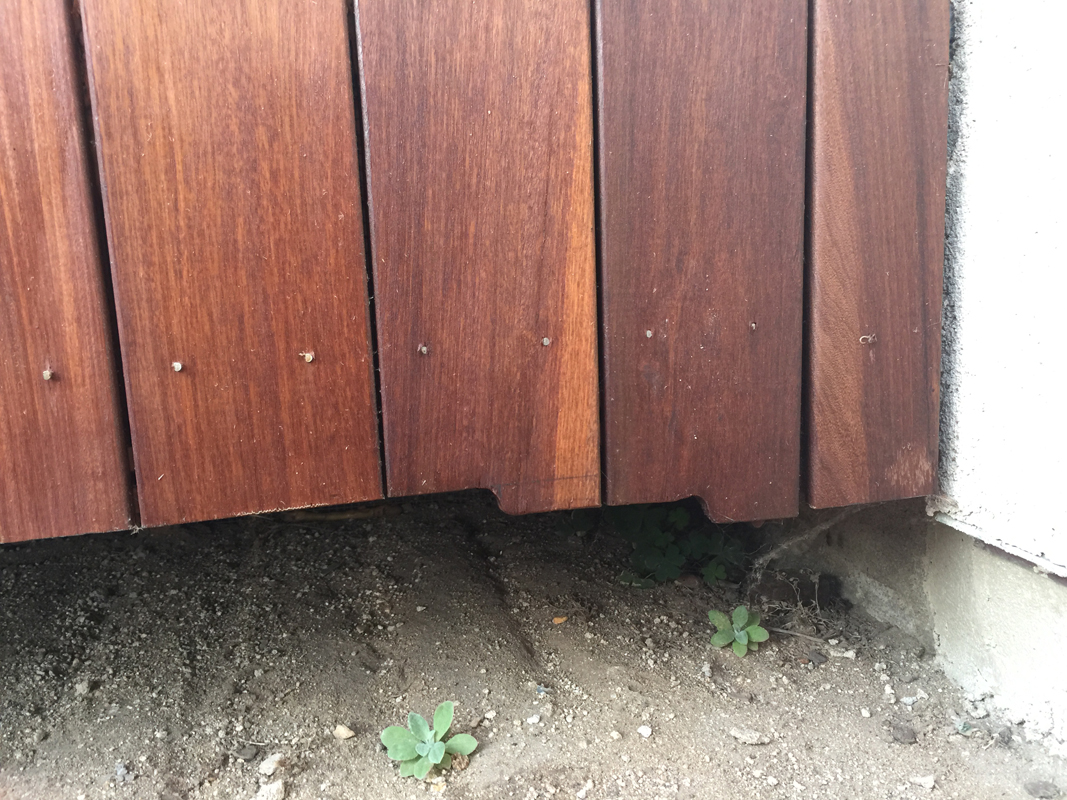
It’s likely that no one will notice this little cloud lift detail on the skirting, but I think it gives the deck a mark of craftsmanship.
So there it is: one small deck.

There are a couple more details I want to cover relating to this door and deck area, but that’s for another post.
Thanks for reading.
