
I covered the guest bathroom on the Precision post where I discussed the importance of thinking through all the details of the tile layout for the floor, walls and shower shampoo niche. Once that was finished, I could move on to the finishes. I put the toilet in right away, so at least we had more than one bathroom that was usable. Not much to say about installing a toilet, other than this particular Toto has a funky installation system. Instead of installing the toilet with a wax ring, you mount a flange to the floor permanently, then the toilet horn slides into the rubber gasket on the flange. That way, if you ever have to pull the toilet for service or a clog, you don’t have to replace the wax ring.
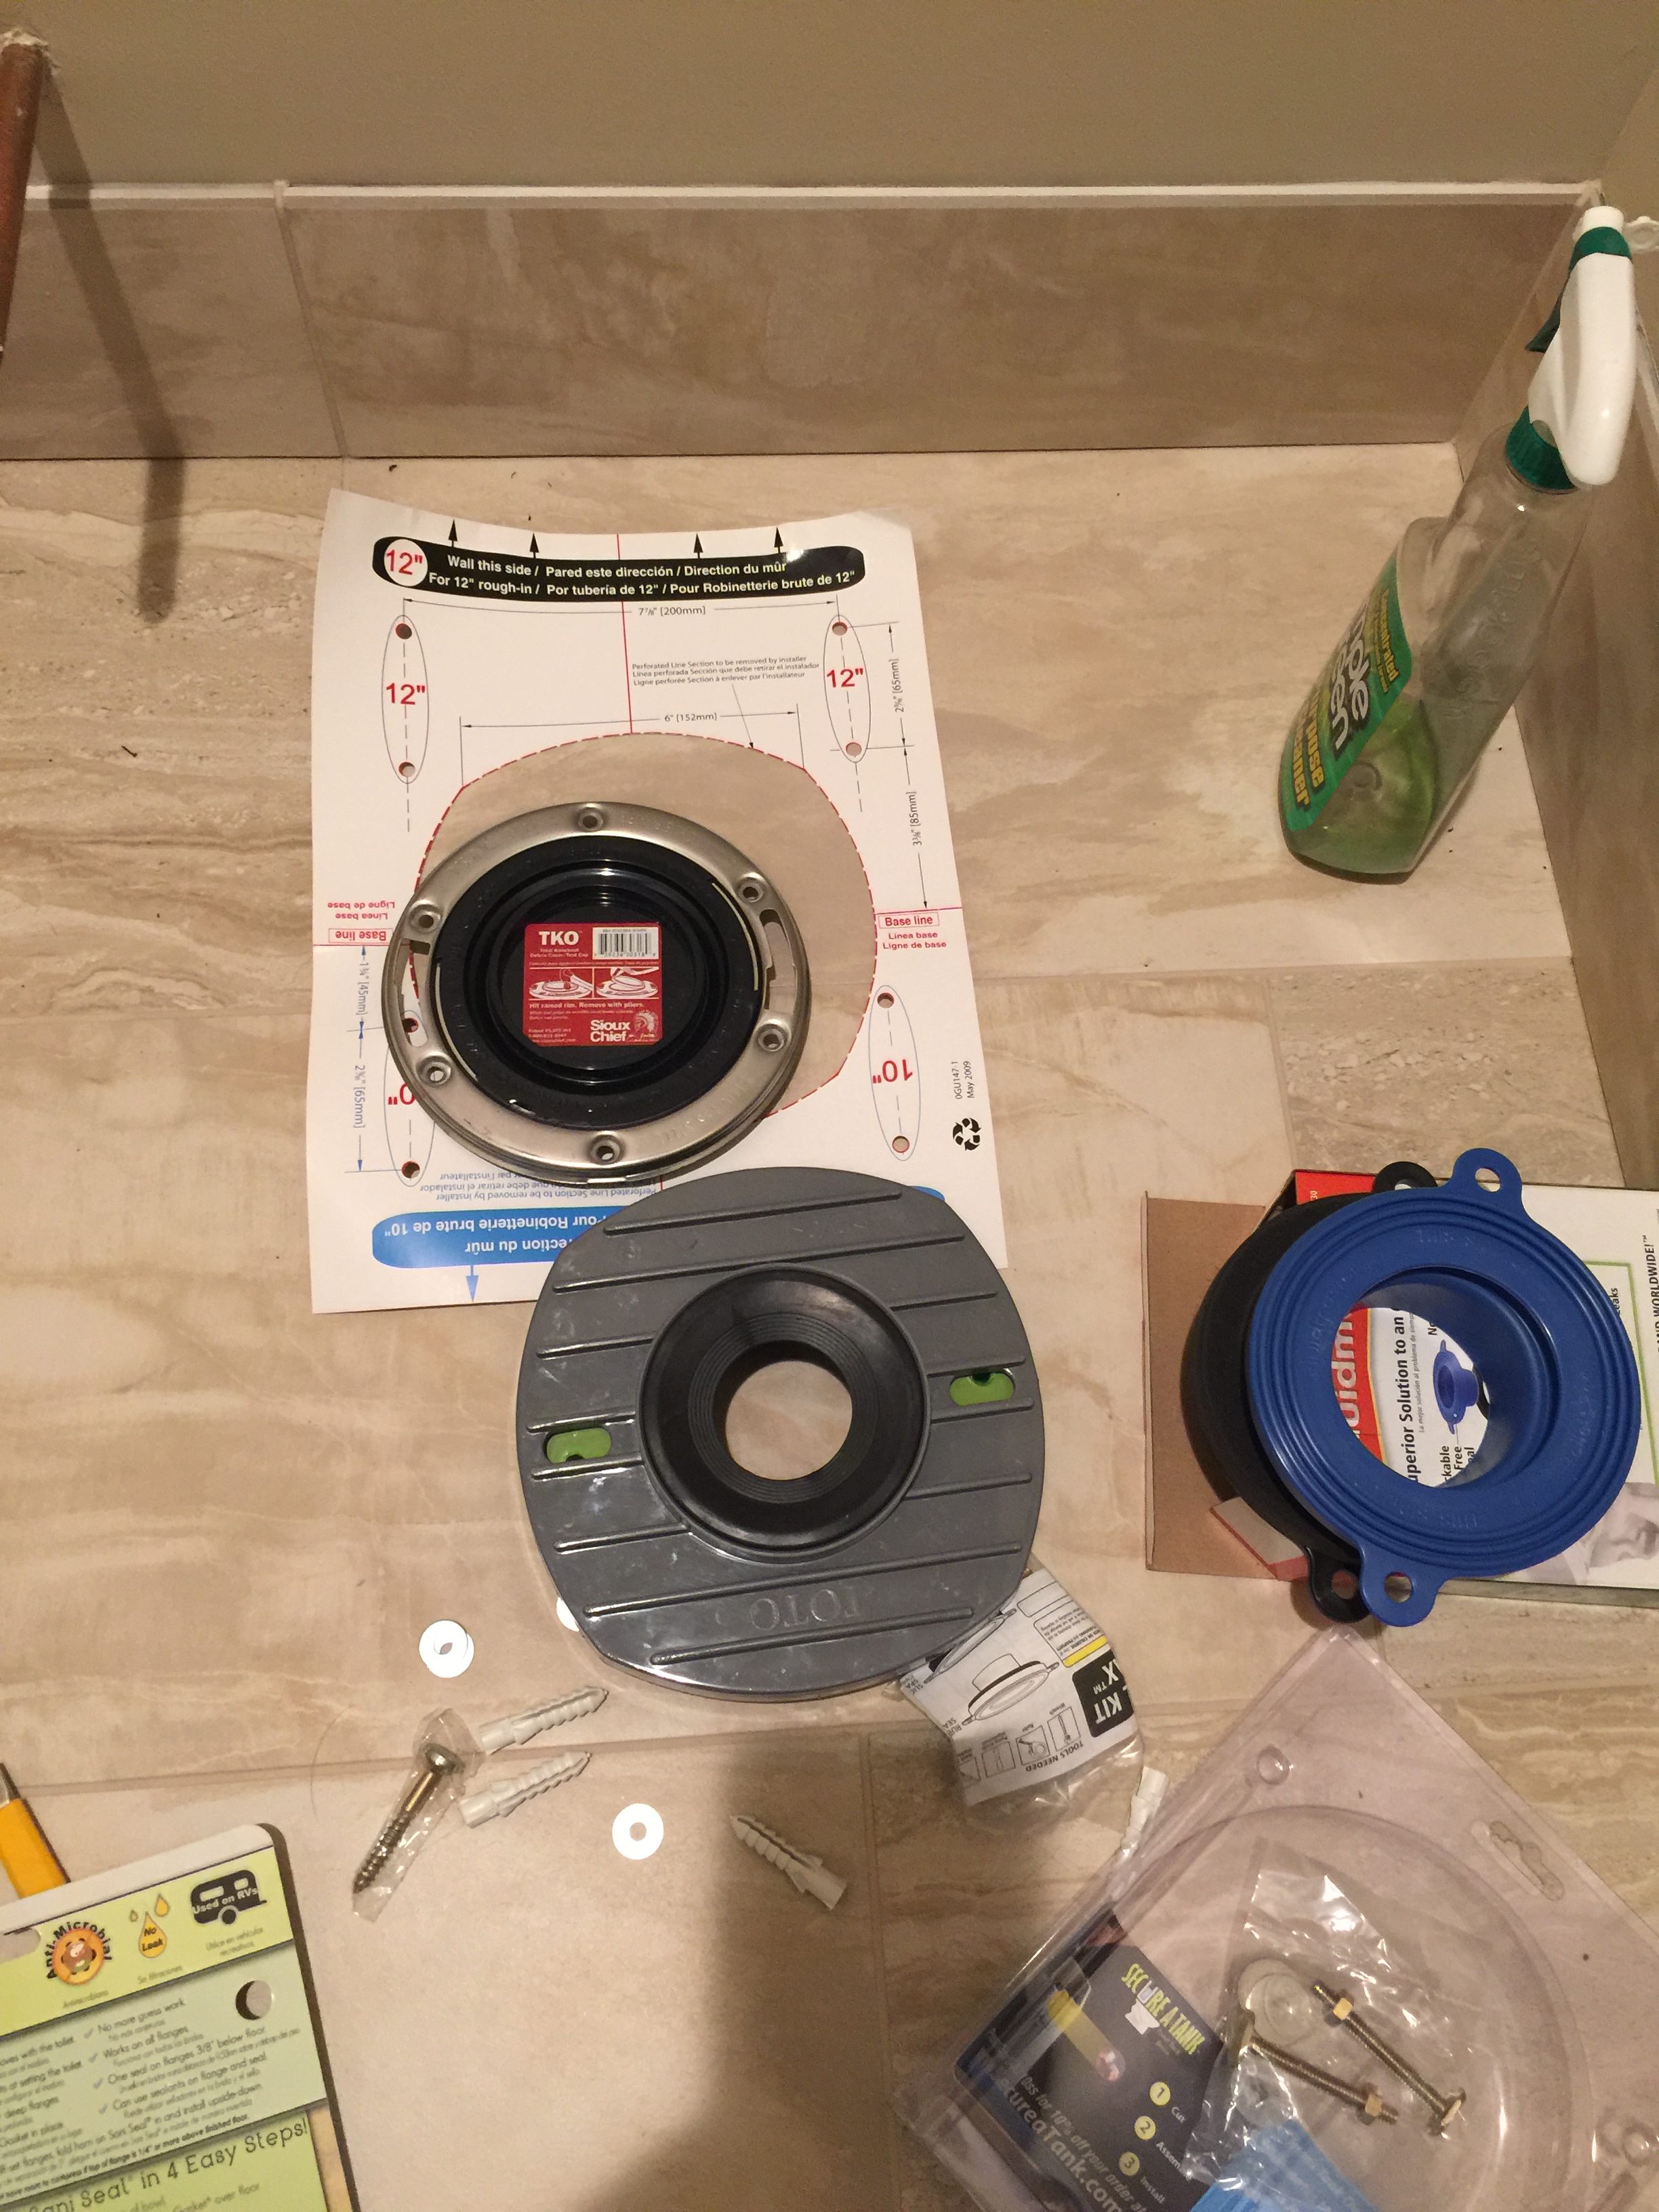
I tried multiple no-wax seals, but the only thing that worked with this proprietary Toto system was a traditional wax ring.
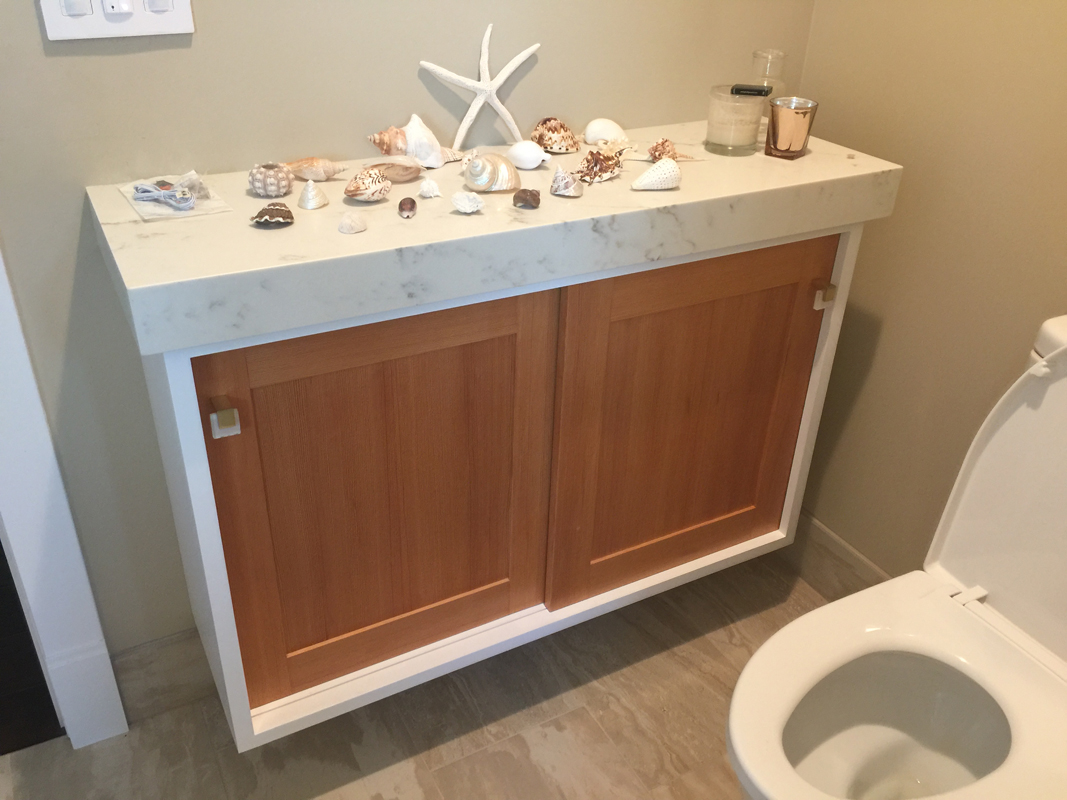
Next, I moved on to the cabinets. I had wanted to do a floating cabinet in this bathroom for a couple of reasons. First, we had plenty of space. Also, storage is at a premium in this house and anywhere you can hide away some stuff, that’s a good thing. The cabinet is simple, just a box made out of Baltic birch plywood and screwed to the wall with some big head construction screws. We painted the box white to match the trim, and decided on natural wood doors to compliment the vanity. Then we had our countertop fabricators make a top to match the vanity.
When I did the demo work in the house, I was surprised by the Douglas fir framing lumber everywhere. Back in the midwest, we saw a lot of SPF lumber but not a ton of Doug fir. I think that it is one of the more beautiful softwoods and I wanted to use some of the old reclaimed framing lumber to build the cabinets. I came up with a design and spent a bunch of time milling old headers into usable lumber. I got this far and then showed it to SWMBO and the designer.
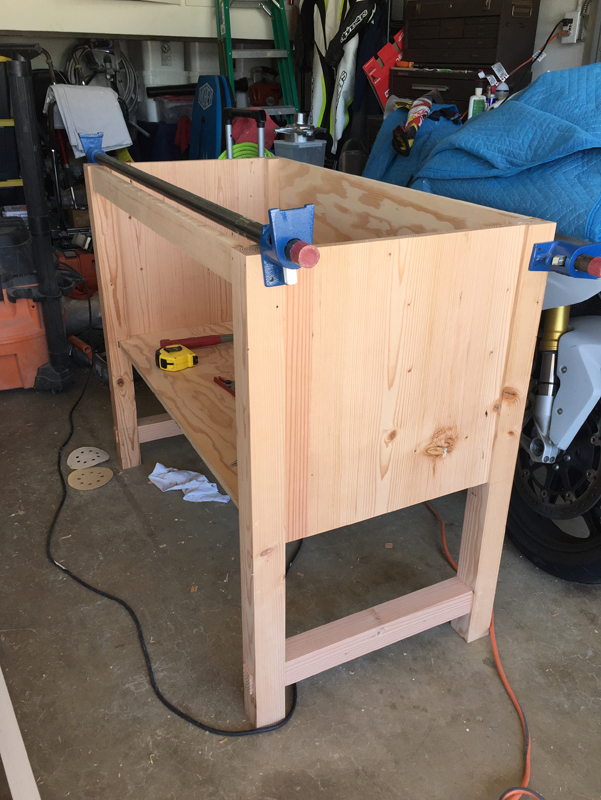
Prototype v1 could be yours, it’s half built and ready to be finished if you are are remodeling a bathroom and want a reclaimed/rustic vibe.
Both thought that it was too rustic for the overall design of the bathroom. So we scrapped that version to make a more sleek and modern version. It’s really a simple design in vertical grain Douglas fir with a door and four drawers. Eve found some very cool glass and gold hardware from a custom shop in Chicago.

The one thing I did not think through was the height of the rough in plumbing drain in the wall. We like tall cabinets because we are both tall and I hate having to stoop and bend to wash my hands and brush my teeth. So I generally build bathroom vanities at kitchen counter height (or higher). But if you are going to build a tall cabinet, you have to raise the plumbing from standard as well or you will have some minor fit issues down the road. For example, I had to cut a little relief spot in the bottom of this cabinet for the P-trap.
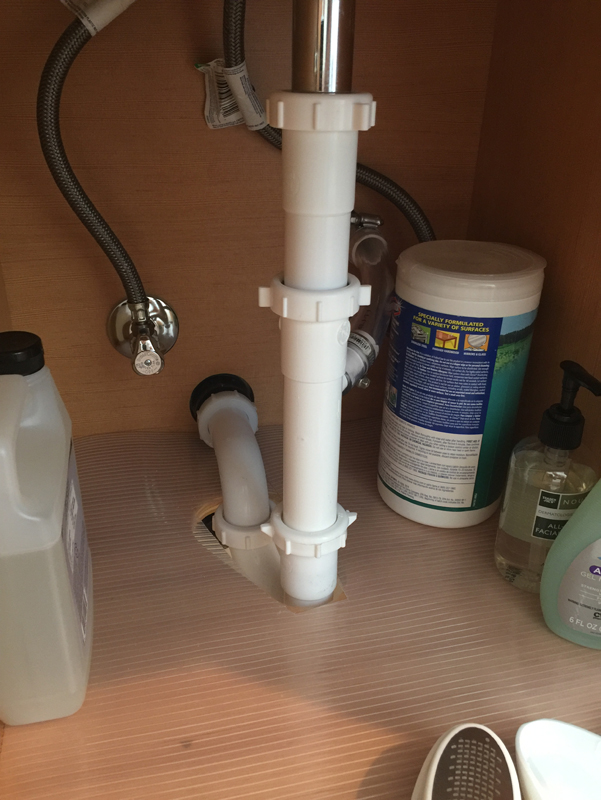
By lowering the bottom of the cabinet slightly, I could have avoided this little whoops…
And since this is a guest/kids bath, the other thing I decided to do was offer a bit of help for people who are not as tall. Rather than make the lower shelf fixed, I set it on some full extension drawer slides so it doubles as a pull out step.

A pair of hidden feet support most of the weight, so even though the drawer slides are only rated for 75 pounds, I can stand on it with no worries.

The feet glide just above the floor so the drawer pulls out easily and still has the soft-close function.
The last thing this bath needed was some linen and towel storage. I framed in a nice linen closet when moved all the walls around. I’ve seen these smallish closets treated in a lot of ways throughout my building career. Most of the time, face-frame cabinet doors just get attached across the front of the drywall. Sometimes people opt for a bifold door. In this case, I wanted something a bit nicer, so I did a modified inset face frame over a built in bank of drawers.
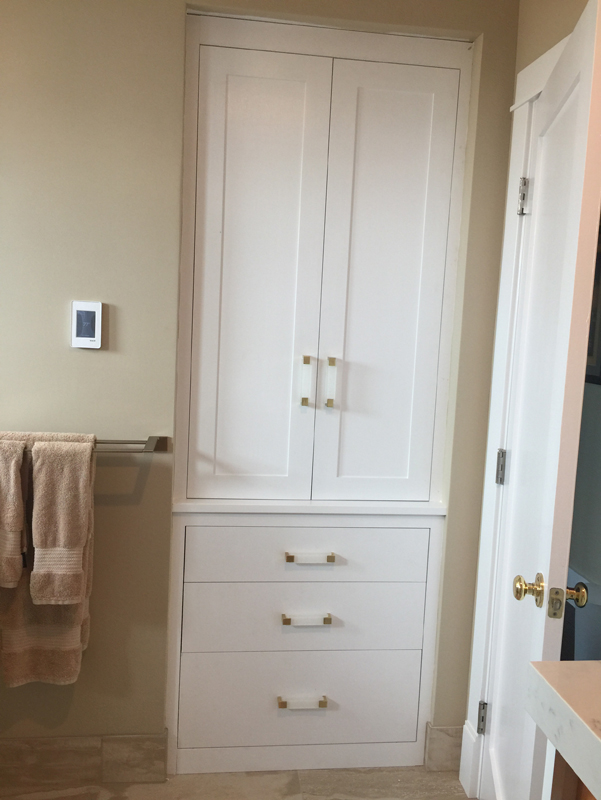
To top has shelves for towels and sheets and the drawers are good for extra soap, shampoo, medicine and the like.
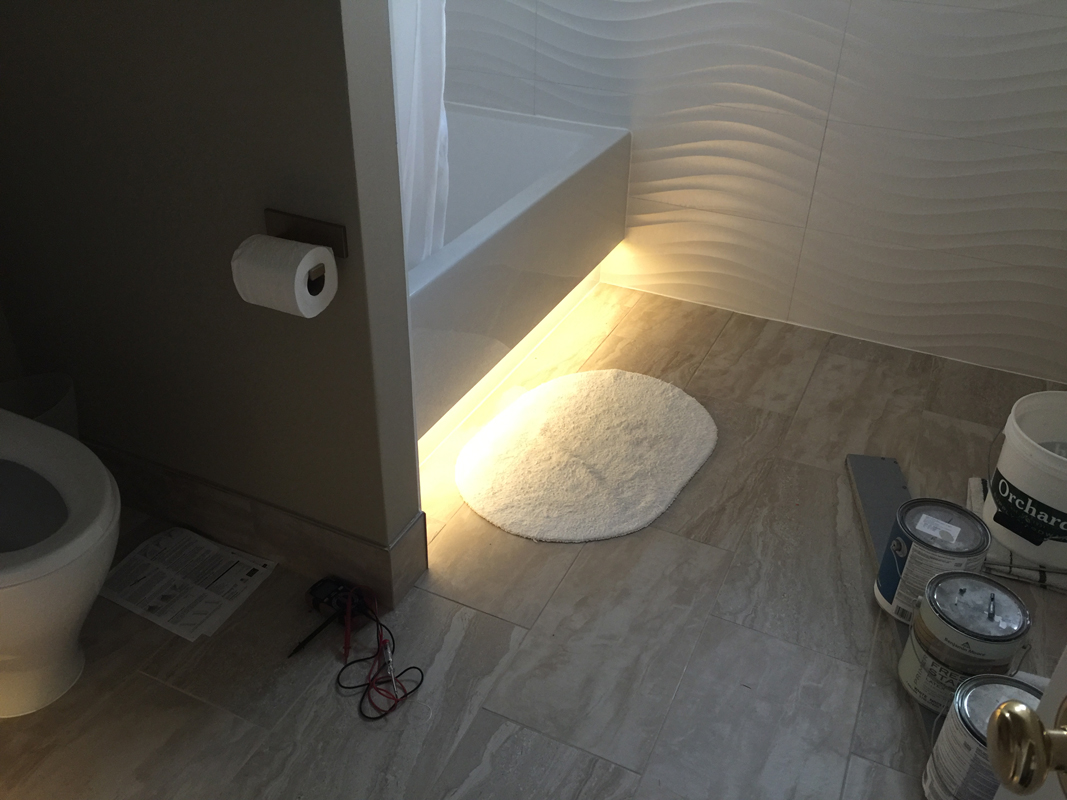
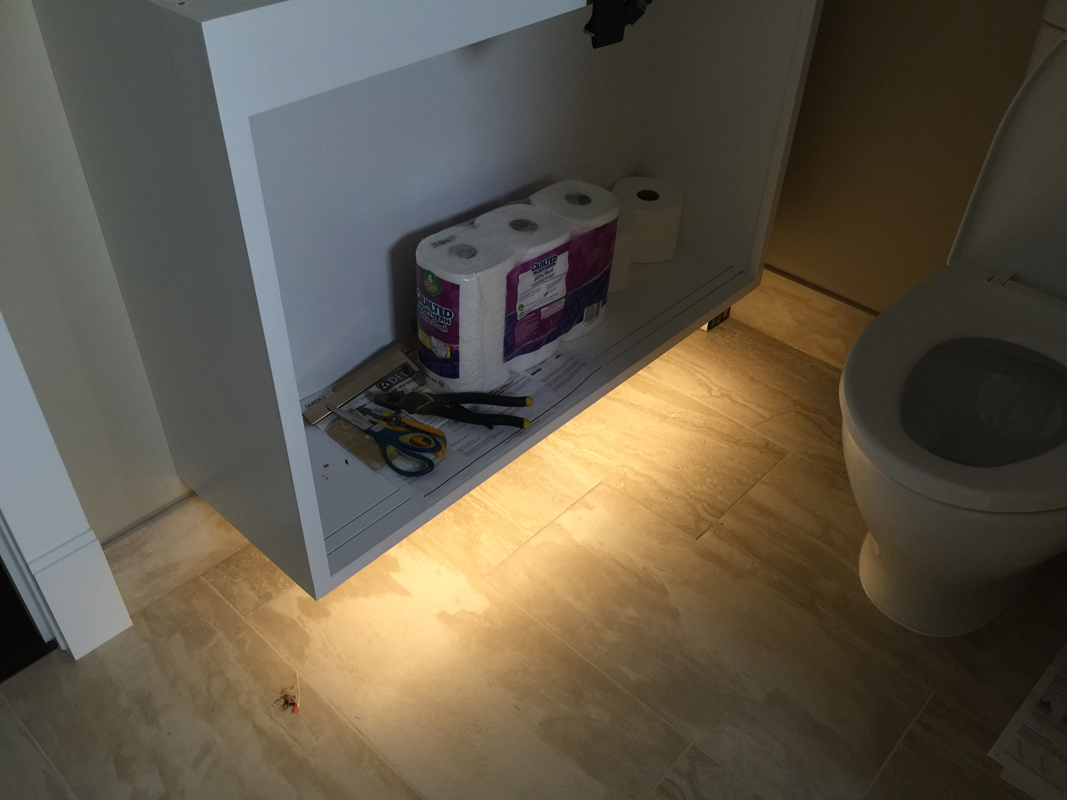
Finally, we added some cool finishing touches. The first was some custom LED underlighting on the tub and floating cabinet. It’s on a dimmer, so we can turn it way down and use it as a nightlight for when guests are in town. It’s also good when entertaining to help guide people to the bathroom.
The other thing we did was build a custom mirror. I’ll get into the details of how we built it in another post, but here it is finished.
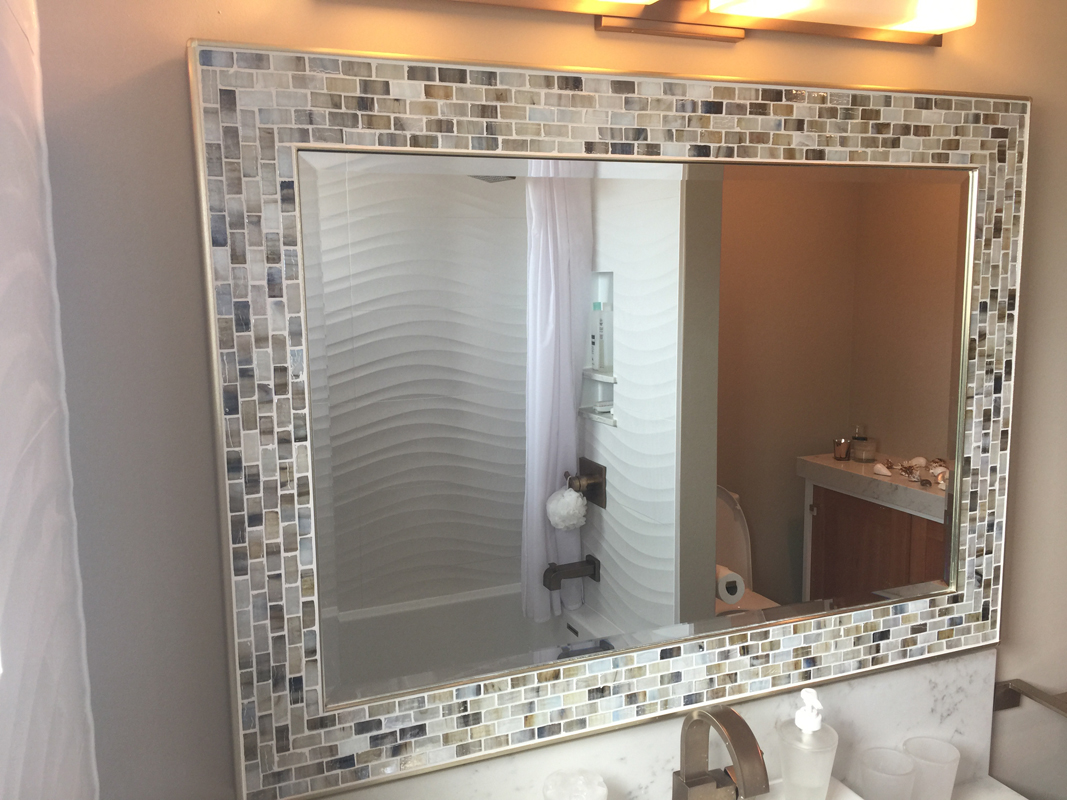
A little tile and some metal Schluter trims turned into a very cool custom mirror.
So there it is. One guest bath. All in all, we are very happy with the way it turned out.

Pingback: The Master Spa Bathroom Part II – Floor |·