
Sorry about the long pause. Things have been quite busy here. We were rushing to get far enough along to have guests for Independence Day, plus, I had a little flurry of consulting work taking up time that I would have normally used for some blogging. I have lots of updates in my head, I just need some time to write them.
Most recently, I’ve been doing the tile work in the main/hall/guest bathroom. Which ties in nicely to this topic of precision. Tiling is precise. There is room for adjustment, but if you make big mistakes with tile, people will notice. I’ve done a good bit of tile work now and I’ve learned some tricks. Mostly through my own mistakes, but I have learned.
The first thing you must do with tile is establish a good layout. Back when we lived in Tennessee, I remodeled the main floor bathroom. I laid out the floor in the room using the longest wall. I centered the tile in both directions. Everything was square. But if you looked down the length of the hardwood floor, the strip-oak floor joints were not parallel with the tile grout joints. I didn’t honor the established lines of the floor. It was not far off, but I could see it. It drove me nuts. Not so crazy that I was willing to rip up the floor to fix it, but I filed the data point away. Use what’s there.
When I started the layout of this bathroom, the first thing I did was establish the sightline of the hardwood so I could make sure the tile was parallel.
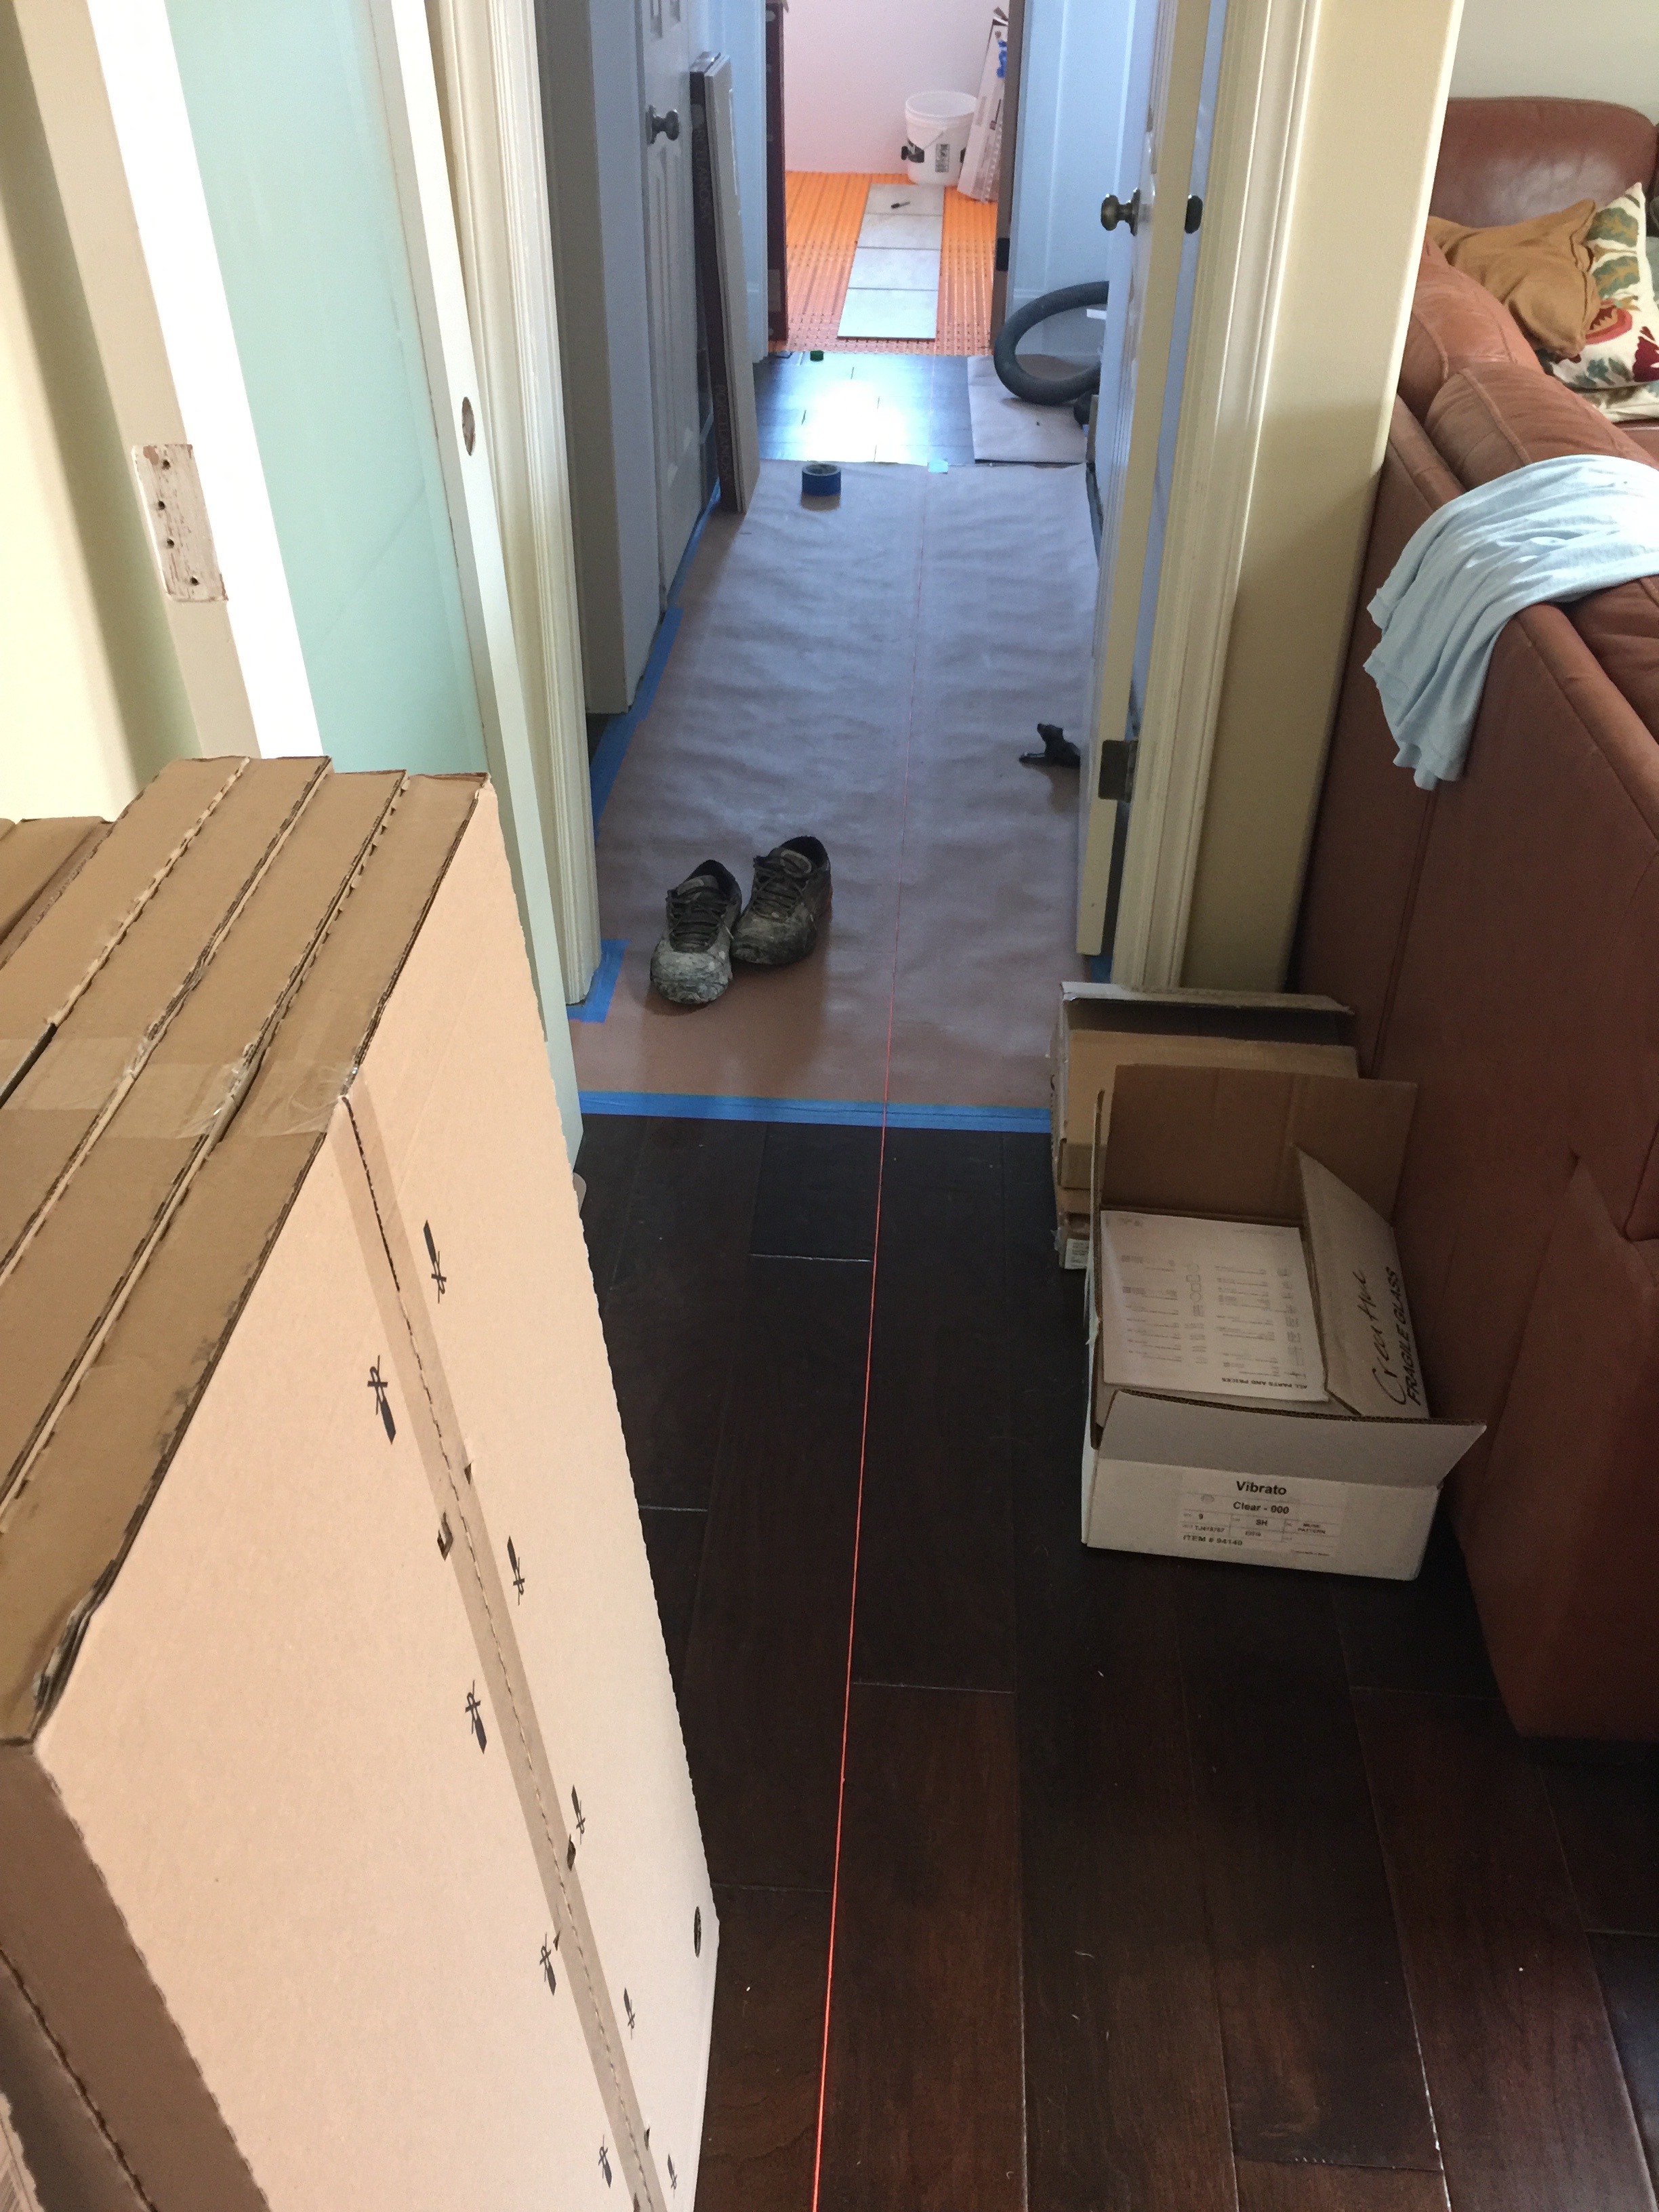
The orange stringline establishes the line of the flooring, to use as a reference when beginning the tile layout.
Once I had a line established, I could get to work on the room itself. Since I framed the walls, everything was plumb, straight and square. (Precision!) When I measured off my reference line, I was within an 1/8-inch overall to both the tub and the opposite bathroom wall.
Now I could do the layout in the room. First I sorted the tile for color and pattern. We ended up using a porcelain tile on the floor because it is super durable and this bathroom will probably get the most foot traffic, particularly with shoes. We picked the pattern in the store, but when the order arrived, there were two different tiles in each box. The store had them both on display, but we didn’t realize that they were mixed randomly in the box. Our mistake.
One of the tiles looked kind of like wind-blown sand. The other looked like a travertine with veining and speckles.

In the store, we picked the tile you see on the left, the pattern of the tile on the right was a surprise.
Typically, I like to use a running bond pattern when I use rectangular tile. Especially when the tile is twice as long as it is wide, for instance a 3×6 subway tile or, in our case, a 12×24 porcelain. But the large format tiles that are so popular these days have a bit of a problem.
They aren’t flat.
It’s a normal, acceptable flaw in the manufacturing process that each tile is slightly bowed along it’s length. The problem is that when you use a running bond pattern, it’s nearly impossible to get the corner of the tile on the same plane as the center. This is known as “lippage”, where the edge of the tiles are uneven on the visible or walkable surface.
The problem can be minimized in several ways: first, the wider the grout joint, the less you will notice the lips. The other thing that is usually recommended is to do only a 1/3 offset. This small difference is just enough that you can get the edges pretty close to flush. Not perfect. But close. There are also a lot of tile leveling systems on the market, like this and this. These work well, but usually I just do everything by hand, especially in small rooms like this one.
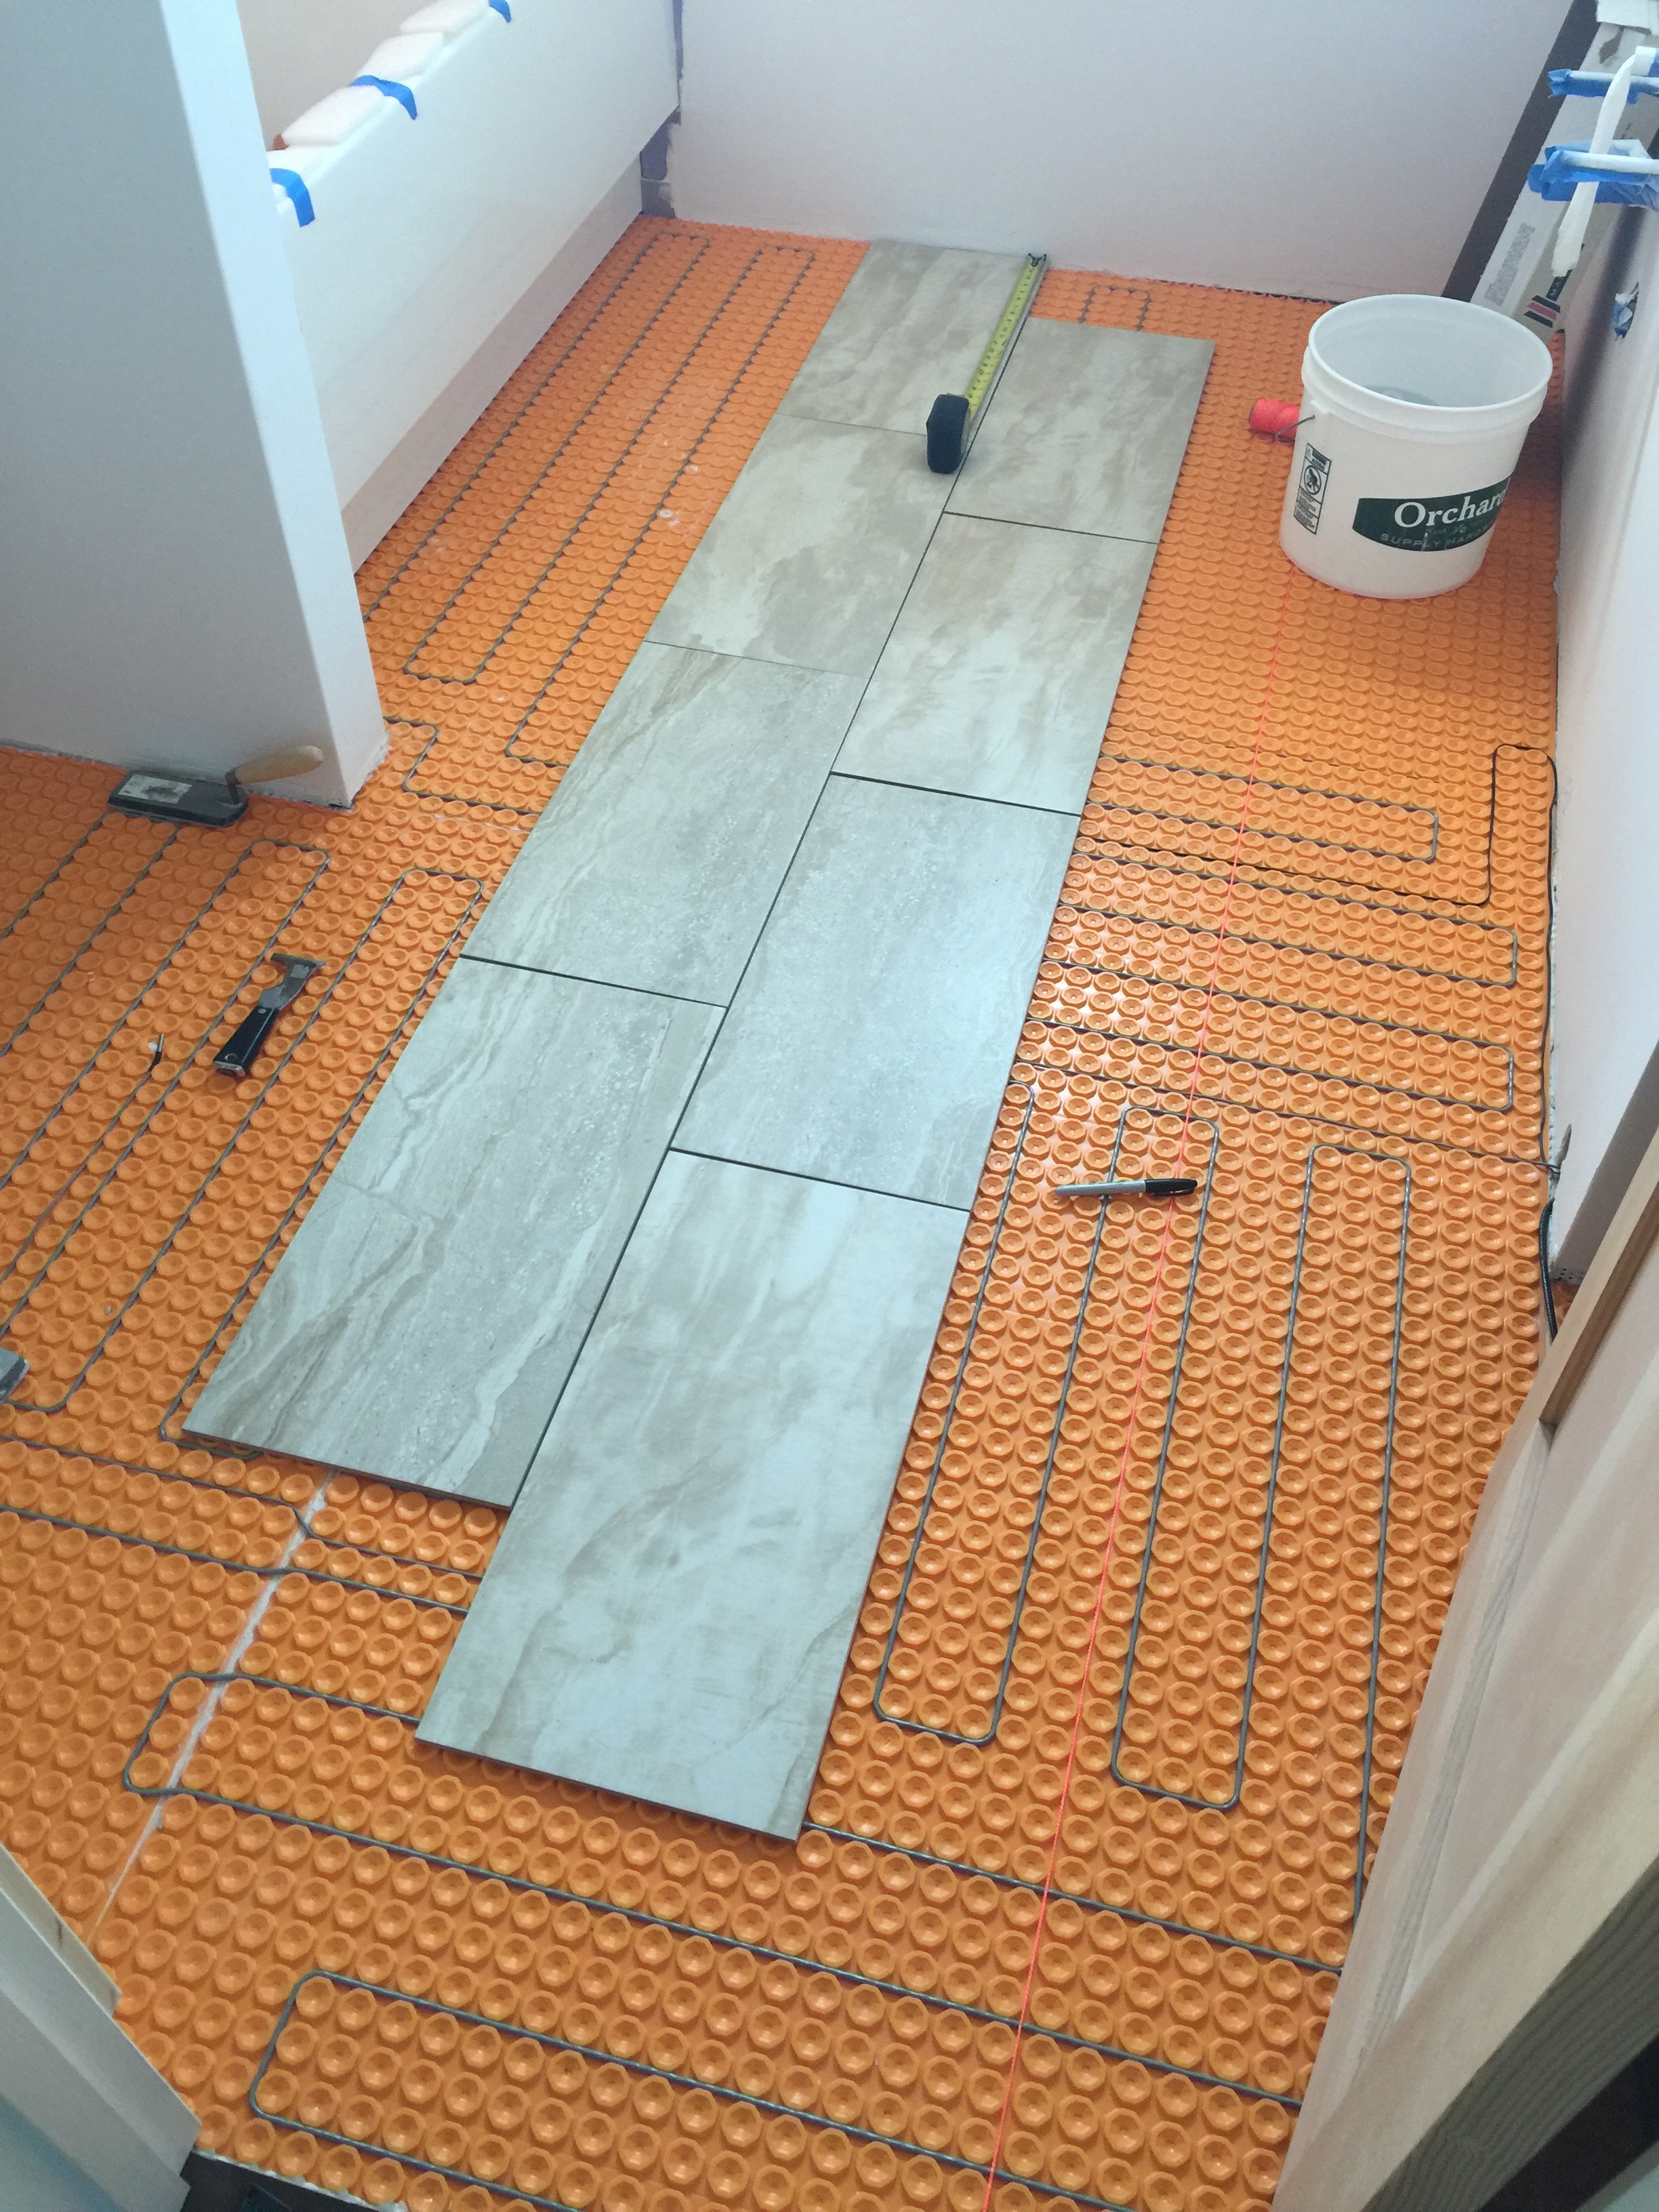
Starting the layout. A 1/3 offset minimizes the lips from the natural bow in the tiles. The gray wire is the floor warming cable.
In the end, I decided to run the tiles with the same coloration in a stair step pattern. This makes the floor layout look intentional, versus random. Once I had the straight lines established, I could go ahead with the install.
In this long, skinny room, figuring out the best approach was difficult. I needed to work myself out the door, so I had to tile the far end of the room, then move into the area where the toilet sits. Trying to work this way probably was not the ideal approach in my quest for precision. I would have been better off to establish a perfect line the entire length of the room, then go back the next day and finish off the nook. It turned out fine, I mean, it’s acceptable to me, but it’s by no means as good as I could have done if I had taken that extra day or two.
Once the floor was complete, I moved on to the walls. The tile we choose has been on our list for a long time. We actually ordered it sight unseen, which drove our salesperson nuts. She just couldn’t believe that anyone would order tile without having seen it in person, but we finally convinced her that it was what we wanted. It’s large format (12×36) so it goes on fast, but the pattern makes leaves little room for error. Plus, it’s only a 1/16-inch grout line, so the face plane has to be exact.

The tile is Porcelanosa Qatar Nacar. The wave pattern ties in nicely to our beach-themed guest room and guest bath.
The progress was moving along nicely until I chipped a tile while setting the tile above. The bummer was that the tile below I had set the day before, so it was on there. Plus, it had the cut out for the electric, which took a lot of patience.
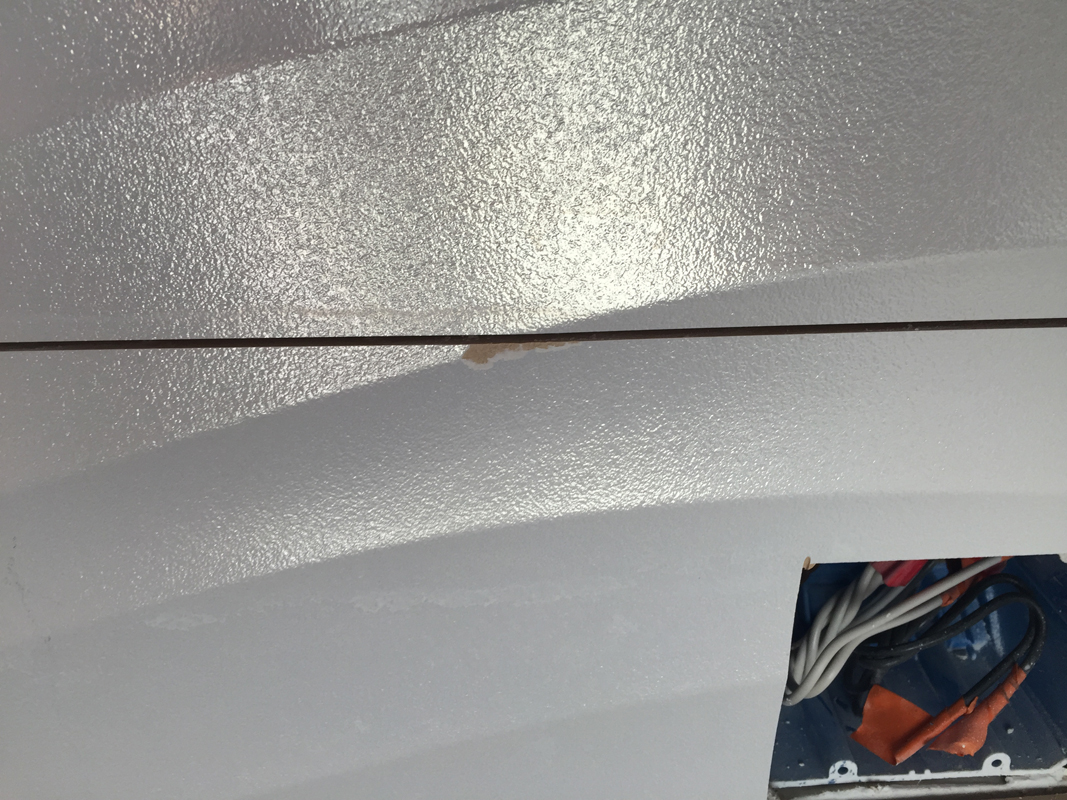
Live with it or rip it out? What would you do?
Despite the reassurance of my father-in-law that no one would notice, I just couldn’t leave it alone. So out came the hammer and I busted that tile out to replace it.
Precision, indeed!
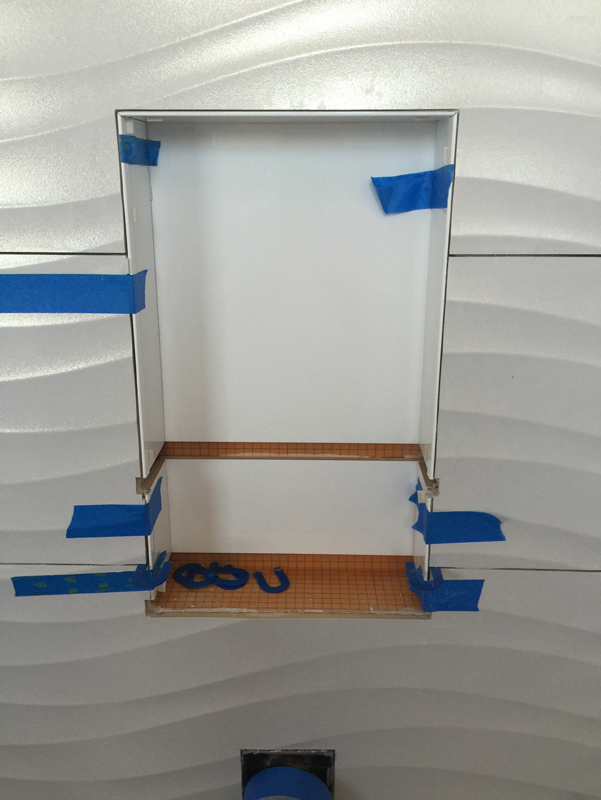
The last bit in this tile project that really tested me was the tile for the niche in the shower. Normally, you would have all the materials on hand to start this tile, but in our case the shelves will be fabricated when the countertops get done by the stone people. So I had to plan for the shelves to go in after the fact.
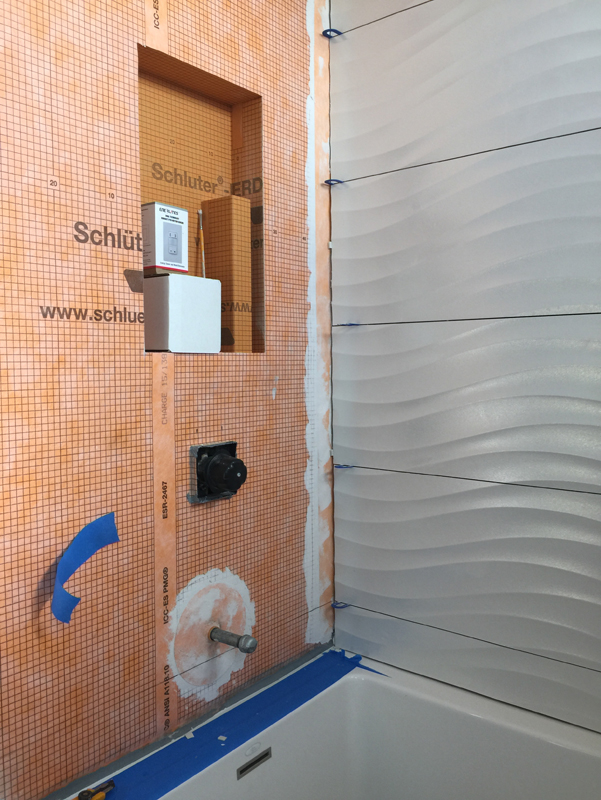
Saving the worst for last. The dreaded niche.
The first step was to make some mock-up “shelves” that were just a bit thicker than the stone we are going to use. I used some Kerdi-board, cardboard and tape to build them. Then I started cutting tile to created the short soap ledge and taller shampoo shelf.

You can see the spacers below the back tile. Once the stone shelves slip in, the gap will be hidden with caulk.
All finished, with the aluminum edge profile installed and all the wave tile in place.
I’ll spare you the details of the grouting. It went fine. Just a lot of physical effort. I’m working on cabinetry, but I will take a few shots of the finished product for the next update.
Thanks for reading…

Pingback: New Life |·
Pingback: Guest Bathroom |·